


 Email
Email SMS
SMS Whatsapp
 Web Push
 App Push
 Popups
 Channel A/B Testing
  Control groups Analysis
 Frequency Capping
 Funnel Analysis
 Cohort Analysis
 RFM Analysis
 Signup Forms
 Surveys
 NPS
NPS Landing pages personalization
  Website A/B Testing
  PWA/TWA
 Heatmaps
 Session Recording
 Wix
Wix Shopify
 Magento
 Woocommerce
 eCommerce D2C
  Mutual Funds
 Insurance
 Lending
  Recipes
  Product Updates
 App Marketplace
 Academy
So, you’ve thought about starting a Shopify store? Awesome. Now, you’ll have more customers and your business will be set for life. End of discussion.
Well, not quite. Shopify makes it easier to sell products. But thinking and actually starting a store are two different things.
Thinking is the easy part. Starting a Shopify store, however, is a bit tricky. Don’t get me wrong. Shopify is easy to use and only requires minimal configuration.
But there are some essential things you have to consider to start a Shopify store. Keep scrolling so you can launch a Shopify store that beats the eCommerce competition.
Contents
8 Simple Steps to Start a Shopify Store
1. Have Everything You Need for Your Shopify Store Ready
Before you start a Shopify store using one of the best eCommerce platforms, you need to have everything ready. This includes the following:
- A business idea
- A logo
- A strong business name
- Products
- Photos
- Comprehensive Content
You may also want to check with your state and local government about any licensing requirements. For most online sellers, licensing is not an issue. But requirements differ depending on location and the type of products or services you sell.
Afterward, you can create a Shopify account if you haven’t done so yet and take advantage of the 14-day free trial.
You do not need to enter any credit card details to begin your trial. But you will be asked a few questions, including your store’s name.
If you haven’t decided on a name yet, Shopify will generate one for you. You can change it at a later time but remember that you can do this only once.
Also, you can purchase a custom domain for your store whenever you like. With a custom domain, you can increase credibility and tell your customers that you are here to stay.
2. Create Your Online Store

Now that you have a verified account to start a Shopify store, you will then be redirected to your admin panel.
This is where you manage your products, orders, store analytics, customer data, sales channels, and marketing activities.
Explore each area of your store admin screen to know all the options and what you can do.
- Home: This is where you can view your store’s daily tasks, recent activities, and steps you can take to improve your business.
- Orders: You’ll find customer orders placed through any of your sales channels here. You can also manually create orders and record orders made outside of the platform.
- Analytics: In this section, you can see powerful analytics that helps you make educated decisions regarding your products and services.
- Apps: You can integrate your Shopify store with third-party apps such as Notifyvisitors to add more functionality. Using Notifyvisitors, you can establish multiple segments based on customer attributes and behavior for more effective conversions.
3. Build Pages
After creating your online store, the next step is to build pages for your site.
These pages can include but are not only limited to About Us, FAQs, Contact, Terms of Service, and Privacy Policy.
Creating these pages will keep your store organized. With an About Us page, you can put a face and a compelling story to the name on the storefront. This lets you build trust and create lasting customer relationships.
On the other hand, your FAQ page will answer common customer questions while your Contact page will provide a way for your customers to reach you.
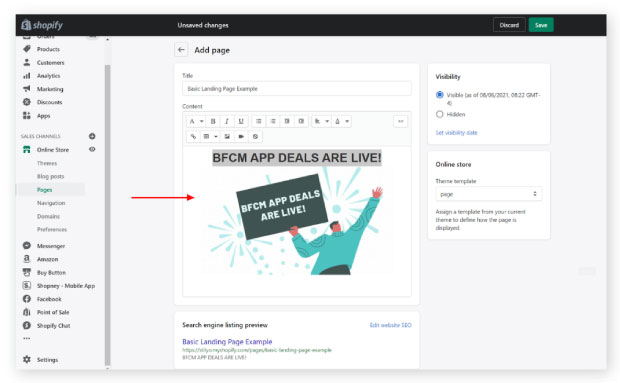
If you decide to add a new page, you can do so through the admin dashboard under the online store sales channel.
Just click the button at the top right and you’ll be shown the “add pages” menu. In this section, you can input necessary information such as title, content, and website search engine optimization.
4. Customize Store Design

A successful Shopify store inspires trust and screams quality. To get there, you have to customize the store in a manner that fits your brand.
Shopify has an official theme store that is packed with over 100 themes. All of the themes can be customized without the need for coding knowledge. Before you decide on a Shopify theme, check its overall functionality and read theme reviews about what other people thought about it.
Also, make sure to customize your store’s design for mobile. When you start a Shopify store, it’s normal to want to make it look great on a PC. After all, you’re most likely working from your desktop. So, the default is to optimize the store for visitors who are also on laptops and desktops.
But, as you may know, the majority of web browsing today occurs on mobile. In fact, recent data shows that mobile eCommerce sales increased by 15.2% in 2021, reaching $359.32 billion.
That increase alone should be reason enough to optimize your store for the mobile experience. Go through all the pages of your Shopify store using a mobile device. In this way, you can find pain points and ensure a fast and pleasant customer experience.
Shopify is mobile responsive. So, your job here is to ensure that you are happy with how the different sections on each page are classified on mobile.
5. Add Products

Now that you’ve got a professional-looking store, the next step is to add your products.
Contrary to popular belief, this process should not be taken lightly. This step requires complete attention since it directly impacts your revenue.
With that in mind, let’s go to the admin panel and click on the “Products” tag to view your inventory. You have options to:
- Manually Add Product: If you have a few products, this will do the trick. You will have to fill out product details such as name, vendor, description, and product type, and upload the required images.
- Import Products via CSV: On the flip side, if you want to upload many products in bulk, you can do so by importing via CSV.
- Import products via a dropshipping app: Shopify allows you to sell products without an inventory on hand. One option is to use a dropshipping provider that seamlessly interfaces with Shopify, such as Printful. As you scale, keeping track of inventory manually can become cumbersome. Inventory management software for Shopify can help automate stock tracking, update inventory in real-time, and reduce human errors.
When filling out product details, know who you are speaking to. Think about what you want your customers to feel and communicate it in your description.
You should also highlight incentives on your product pages and make your text easy to scan. So, your visitors can pull out the information they need and won’t be put off to the point that they abandon the website altogether.
Moreover, you can also organize your products into collections. In this way, you can curate products to target a specific audience and increase visibility.
6. Configure Shipping and Taxes
After adding your products, you must now choose how you’ll ship your products to your customers.
On the main dashboard, go on the “Set shipping rates” icon to get started. This will redirect you to a screen where you can choose from all the major shipping options. You can offer free, flat, or calculated shipping rates that appear during customer checkout. However, before you decide on shipping rates, get familiar with shipping profiles and zones.
Shipping zones are a group of regions or nations that you create for your shipping rates. On the other hand, shipping profiles let you set rates for particular products and locations.
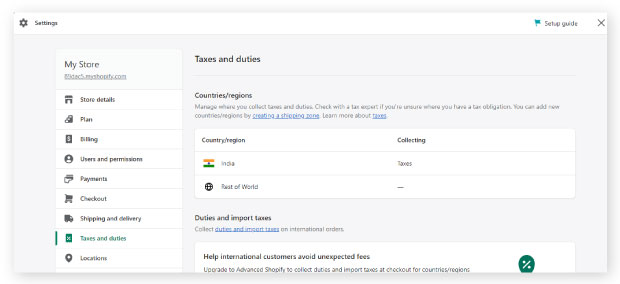
Besides shipping rates, you also need to configure your taxes. Shopify handles tax calculations automatically since it uses a worldwide tax rate. But you still need to research or consult a tax professional to ensure that you are charging and paying the right amount.
If there are specific tax requirements within your region, you can opt to override these settings. Just go to the Settings tab and click on the Taxes icon to edit the rates or change the default rate.
7. Set up Payment Gateways
Setting up your payment gateway is another important step to having a functional Shopify store.
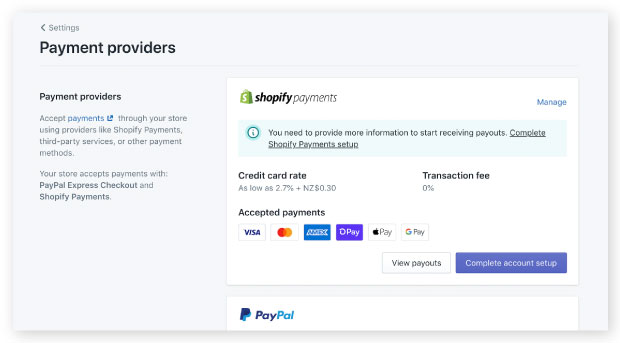
You can easily use the app’s default payment gateway called Shopify payments. This solution is connected to your store automatically. This means you no longer have to pay a transaction fee and will receive payments at no extra cost.
You also need to have multiple payment options available to customers. As businesses become more interconnected through the internet, your customers are now expecting you to cater to multiple payment modes.
Without interoperability, payments are only possible when consumers and businesses are using similar providers. This minimizes the number of acceptance points for your business. With over half of consumers shopping online since the pandemic, not offering multiple payment options can lead to missed conversion opportunities.
Luckily, Shopify supports over 100 third-party payment gateways, including FastoPayments. This opens your Shopify store to a larger scale of potential businesses that would be unavailable otherwise.
It also provides more convenience to your customers making cross-border payments. Since Shopify is interoperable, you can make customers’ purchases in their domestic currencies.
This speeds up payment processing and eliminates currency conversion errors.
8. Launch Your Store
Your store looks professional, your products are locked and loaded, and you are ready to go.
But before you launch your store, you need to create a store launch checklist. This reduces ambiguity and centralizes the work that needs to be done.
Depending on your Shopify store requirements, your checklist should include the following:
- Review payment gateway settings and checkout experience
- Optimize website images
- Prepare standard pages
- Perform content audit
- Check billing information
After taking a comprehensive look at the essential items for your Shopify store, it’s time to give the go-ahead and start selling.
Winning the eCommerce Competition with the Best Shopify Store
Competitiveness doesn’t begin to describe the eCommerce landscape. But using the steps above, you can start a Shopify store that helps you stand out and win in the cutthroat eCommerce industry.
FAQs
1. What countries is Shopify available in?
You can use Shopify in any country you want. But Shopify payments are only available in 17 countries. The list of supported countries includes Sweden, New Zealand, Australia, and the United Kingdom.
2. Does Shopify support other languages?
Shopify supports multiple languages. These are French, Spanish, Japanese, Italian, English, and Brazilian.
3. What skills do I need for Shopify?
Shopify is easy to use and does not require coding knowledge. But if you want to add any features or customize your site, it would be helpful to have knowledge of JQuery, JavaScript, and PHP.
4. Can I have my own domain name on Shopify?
You can add multiple domains or subdomains to your Shopify store. Depending on your pricing plan, you can add up to 1,000 domains or subdomains.

