


 Email
Email SMS
SMS Whatsapp
 Web Push
 App Push
 Popups
 Channel A/B Testing
  Control groups Analysis
 Frequency Capping
 Funnel Analysis
 Cohort Analysis
 RFM Analysis
 Signup Forms
 Surveys
 NPS
NPS Landing pages personalization
  Website A/B Testing
  PWA/TWA
 Heatmaps
 Session Recording
 Wix
Wix Shopify
 Magento
 Woocommerce
 eCommerce D2C
  Mutual Funds
 Insurance
 Lending
  Recipes
  Product Updates
 App Marketplace
 Academy
In this blog, we’ll see how to create a journey with Journey Builder in NotifyVisitors panel.
Contents
Getting Started with Journey Builder
Learn integration:
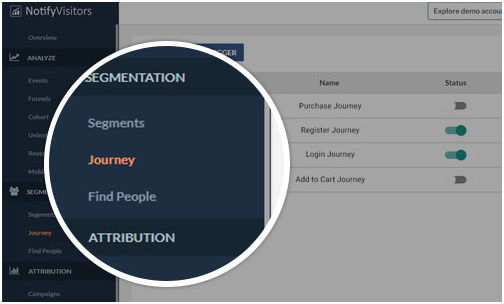
1. First, go to Analytics product and then click on Journey tab in the left navigation bar.
2. Now Click on Create Journey button, a popup will come to screen. Enter the name of the journey and choose an event on which journey will start.
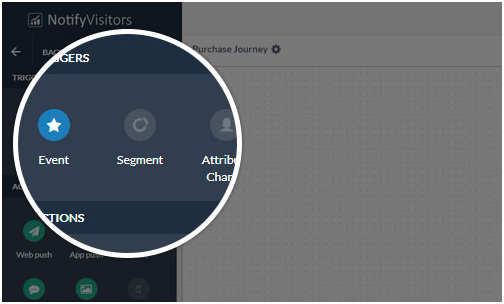
3. Now you will see a left panel with lots of options. We will discuss each section one by one.
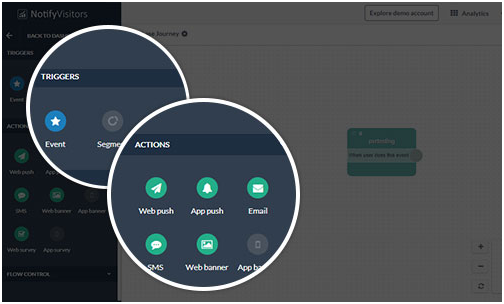
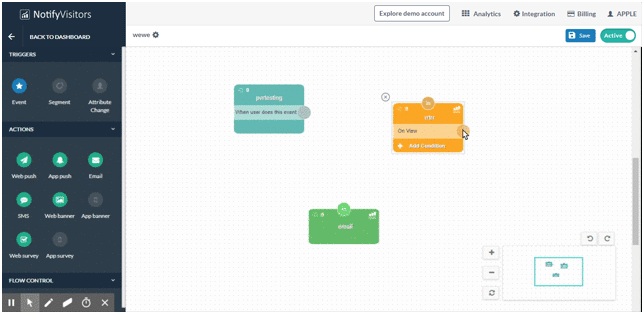
4. The first section is the Event section. In this section, you can select your entry point for users like an event or a segment of users. Currently, events are active and segment, geolocation is in progress.
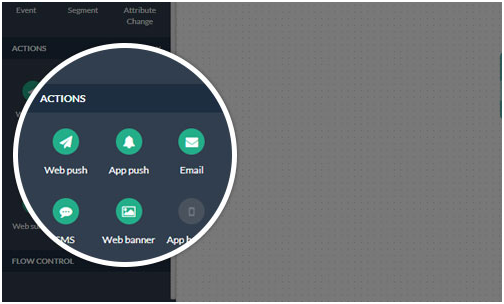
5. The second tab contains all the multi-channel notifications to engage with your users. It contains an in-app message for both android and ios, Web and app push, Web banner and survey, Email and Sms.
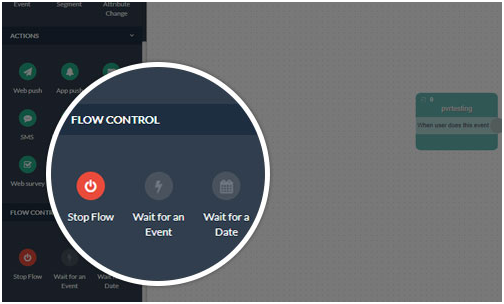
6. The third section contains a stop and waits for an option, which we will discuss later in this blog.

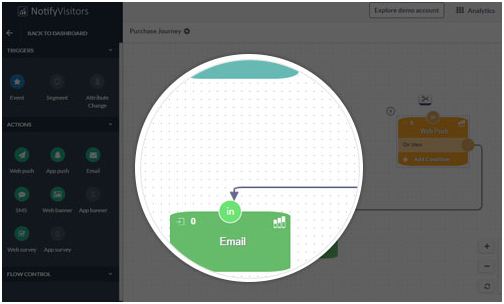
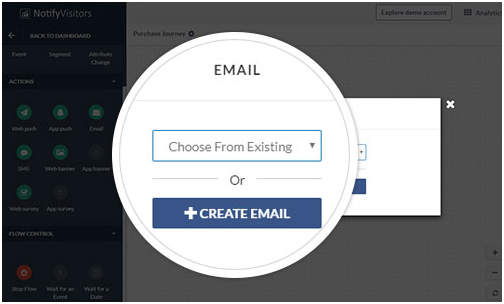
7. Now drag an option from the left menu like email or push and drop in the canvas area. A popup will come asking for notification or email you want to send. You can either select from already created notifications, or you can create new notifications by clicking create a new button.
8. You can set the time after which this notification will be scheduled for the users. You can also set cancel events, which will reject the scheduled notifications on performing specific events.
9. After filling the details popup will auto close. Now it’s time to connect the event with our notification. Simple drag a line from event box and attached with push box. It will automatically connect, and now your first small journey is set. Whenever users will perform this event, they will get this push notification. If the user performs the cancel event which you defined for the notification, then the notification will be canceled for that user.
10. Similarly, you can choose any other option in the same way.
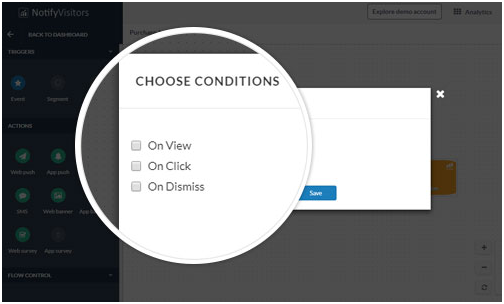
11. Now in the second step, what will happen if users click on push or cross it or just view it?
Just click on “Add conditions” link on the push box, a popup will open with different options. Now choose the condition you want, let’s choose on dismiss condition, a popup will auto close and you will see a dismiss condition is added in the box.
12. And now drag email, push whatever you want to send on push dismiss and set the details.
13. Now drag a line from on dismiss tab from push box and attached with your new email box.
14. Now whenever users will dismiss the push they will get an email after the time you specified.
15. In this way, you can choose multiple conditions on any channel.
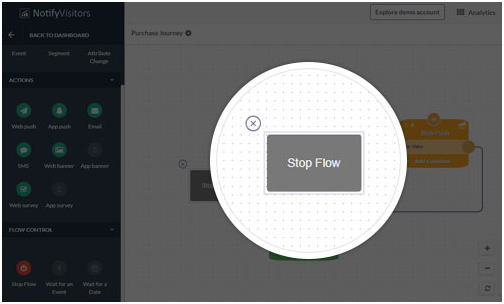
16. If you want to end a journey simply drag stop option from the third tab in the left menu and attached with your journey.
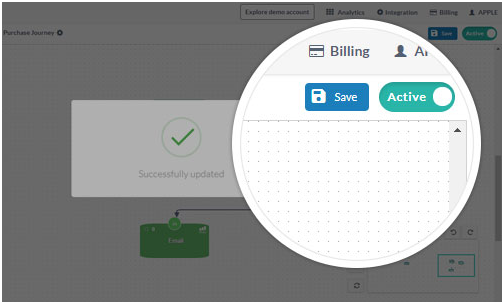
17. Now the journey is completed, it’s time to activate it. In the top menu there is a status button, click it to activate it or deactivate at any time.
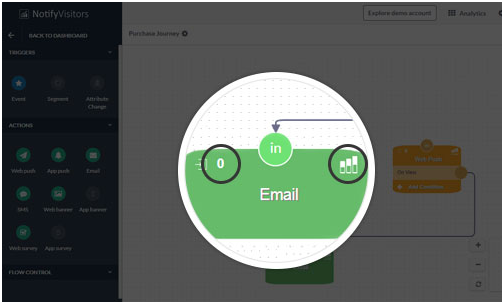
18. For stats, you can see there is an icon on both the left and right sides of each section. Icon with an arrow will show how many users are entering in the journey. And analytics icon will show detailed stats for email, push whatever the channel you choose.
19. For example, in this sample journey, total 55k users performed the event, and only 52k are eligible for receiving a push, and only 15k users dismissed the notification who will be eligible to get an email.
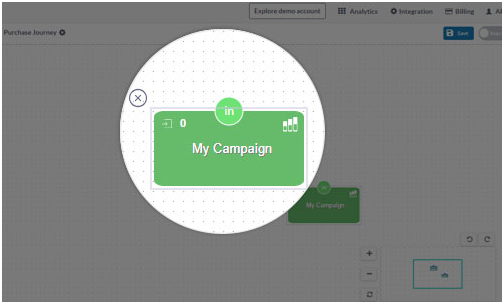
20. Now if you want to change notification settings click the heading in any section box it will open the popup again and you can change your settings here
For creating a journey, first, create events and set up email, push and banners settings. You can set this in their respective panels. You will get a list of all the notifications you set in your journey.
Also, here are a few some related blogs that must read next:
How NotifyVisitors Journey Works?
Journey Builder: Visual Builder to Create Omnichannel Marketing Campaigns

