


 Email
Email SMS
SMS Whatsapp
 Web Push
 App Push
 Popups
 Channel A/B Testing
  Control groups Analysis
 Frequency Capping
 Funnel Analysis
 Cohort Analysis
 RFM Analysis
 Signup Forms
 Surveys
 NPS
NPS Landing pages personalization
  Website A/B Testing
  PWA/TWA
 Heatmaps
 Session Recording
 Wix
Wix Shopify
 Magento
 Woocommerce
 eCommerce D2C
  Mutual Funds
 Insurance
 Lending
  Recipes
  Product Updates
 App Marketplace
 Academy
With most online shoppers checking their email on a daily basis, email marketing is an effective means for e-commerce businesses to reach their customers. Additionally, the easy automation of it helps your business get in front of them even while you’re not working. This blog tells you how to set up email marketing on Shopify stores.
Contents
How to Set Up Email Marketing on Shopify Stores?
You can set up shopify email marketing in two different ways-
- Using the Shopify Email marketing app offered by the Shopify team.
- Using a third-party email marketing software that integrates with Shopify.
In the following sections, we’ll discuss how you can set up your email marketing on Shopify using each of these options.
How to Set Up Email Marketing on Shopify Store Using the Shopify Email Marketing App?
Shopify Email app operates right within the Shopify dashboard. To use it, you need an active Shopify account and the Shopify Email Marketing app installed on your account. When you subscribe to Shopify, you get to send up to 10,000 emails for free every month. If you send more emails than this, you’ll be charged $0.001 per email.
So, if you send 20,000 emails per month, you won’t be charged anything for the first 10,000 emails. And for the next 10,000 emails, you’ll have to pay $10. After you install the app, Shopify automatically adds all your subscribers to the contact list, makes workflows and automation available, syncs products, and enables segmentation.
Here are step-by-step instructions on how to set up email marketing on Shopify Store using the Shopify email Marketing app.
1. Create an email campaign
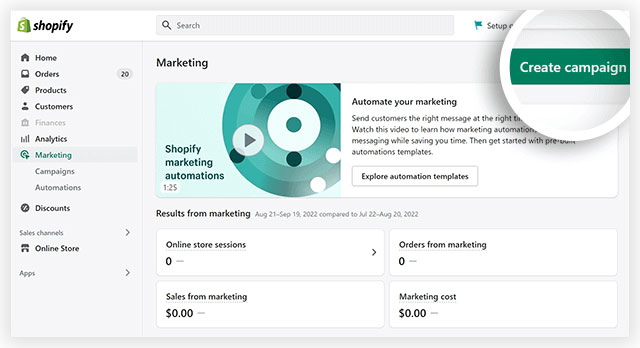
To create an email campaign, go to the “Apps” section in your Shopify dashboard and click through “Shopify Email”. Now, click the button “Create an email campaign”.
2. Choose a template
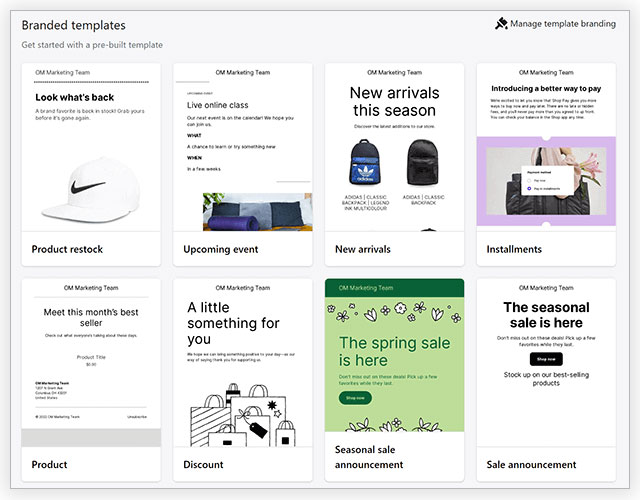
Shopify presents plenty of professionally designed templates. There are options for new arrivals, discounts, upcoming events, sales season announcements, product restocks, and more. Choose one that would go with your needs and then customize its fonts and colors to match your branding.
There’s a button in the top right corner of this very page to help you keep your templates’ looks consistent across all emails.
3. Add campaign details
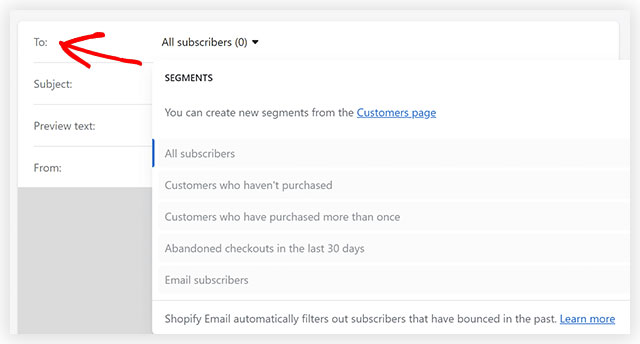
Now click the “Shopify email campaign editor”. Here, you’ll be able to include campaign details such as sending email addresses, subject line, and preview text. Pick the dropdown menu given at the “To” address section.
This will present you options such as “All subscribers”, “Customers who haven’t purchased”, “Abandoned checkouts in the last 30 days”, etc. Select the segment you want to target.
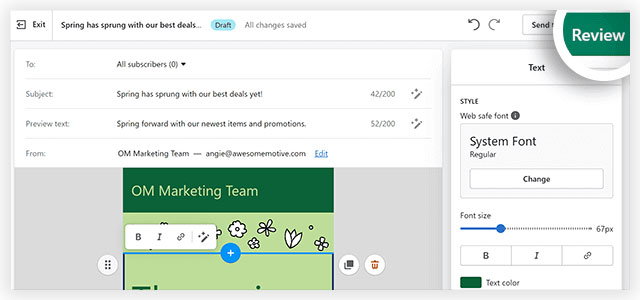
4. Write your subject line and preview text

Now fill in the subject line and preview text of the email. Subject line is the single line that recipients see when your email gets into their inbox. And preview text, also known as preheader text, is the text that shows up below or next to the email subject line. It’s a brief description of your email’s content.
5. Write your email
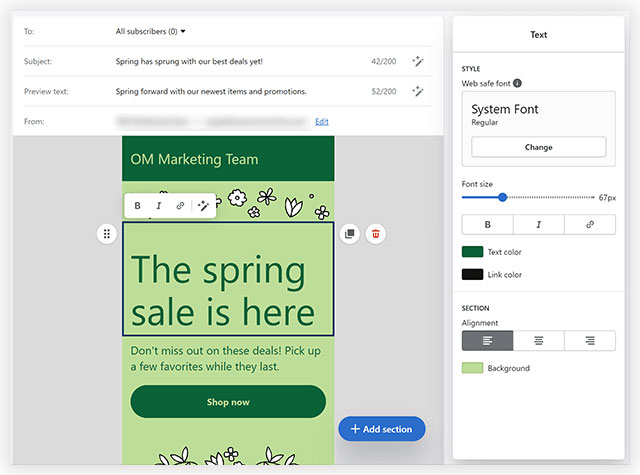
Now write your message to the audience. Keep in mind that short content broken into paragraphs promotes readability. Use the email editor to edit text, drag elements around, and modify other modules within the template.
You can even replace the image in the template, if you would like to. The “Add Section” button allows you to add images, buttons, products, dividers, and more.
6. Review email
Now that you’ve created your email, you’ll see two options. These include “review” and “Send test”. The Review option allows you to go through a list of all modules of the campaign before sending. The Send Test option presents a popup into which your email address to view the campaign in your inbox.
7. Send or Schedule the email
When you’re completely happy with the email, click either the send or schedule button. While the former immediately sends the email, the latter presents you with fields to select a later date and time for sending it.
That’s it. This is how you should set up email marketing on Shopify stores using Shopify Email. Now let’s get to how to set up email marketing on Shopify using third-party software.
How to Set Up Email Marketing on Shopify Store Using Third-party Software?
There are numerous options when it comes to using third-party software for email marketing. Now you may wonder why an e-commerce store would go for such a paid software when Shopify Email is offered for free for up to 10,000 emails.
The reason is that Shopify Email has only basic email marketing features and branded templates. On the other hand, some of its popular third-party counterparts offer a more comprehensive set of features and tools including segmentation, automation, multi-channel integration, reporting, etc. That’s why we recommend the use of software like NotifyVisitors.
Here’s how you set up email marketing on Shopify stores using NotifyVisitors. For this, you’ll need an active Shopify account, an active NotifyVisitors account, and integration of NotifyVisitors software on your Shopify store. If you’ve all these ready, then you can start creating email marketing campaigns.
1. Import contacts
Once you integrate NotifyVisitors email marketing software and Shopify, your existing contacts between the two platforms get synced. This way, you’ll have all your NotifyVisitors contacts in Shopify and vice versa.
But if you’d like to import contacts from other sources, go to “Contacts” in the NotifyVisitors dashboard and import or create contacts there (manually type in the contact details and save those to your list).
2. Include a subscription form to Shopify
When you integrate NotifyVisitors with Shopify, your forms on Shopify stores are set to send all data collected to NotifyVisitors software. This simplifies the job for you. But just cross-check to see if the theme has a subscription form. Just go to “Themes” in your Shopify interface and then click “Customize”.
If there isn’t any form, you can insert one by clicking the “Add Section” module anywhere on the Shopify editor. Then select the button “Email Signup” and customize the form style and the details you want it to gather.
3. Consider advanced segmentation
Notify Visitors offers an advanced segmentation feature. This lets you meaningfully segment your subscribers based on their geographic location, demographics, the technology used, subscription period, past purchases, onsite behavior, engagement level, and more. This will help target users better by delivering highly-relevant messages to them.
To create a segment, go to “Contacts”, then to “Segments”, and then, “Create a Segment”. You can use the “Select Condition” menu from the dropdown to choose events and properties that the contact must fulfil to be categorized under that segment. Remember that segmenting will require you to include additional fields on your lead generation forms.
4. Craft an email marketing campaign
Now you can run email campaigns for making announcements, promotions, etc. Unlike automated transactional emails and workflows, these need to be scheduled. To create a campaign, go to “Campaigns” and then to the “Create an Email Campaign” menu.
Enter a Campaign name and click the “Create Campaign” link. Now follow the list of steps you’re presented with to craft and complete the campaign.
These steps include adding the “to” and “from” email addresses, the name of the campaign, the subject line, the preview text, and the email message, and then sending it out immediately or scheduling it to be sent at a later time.
It also includes picking a template of your choice and customizing it before writing your email copy, and testing/previewing the email.
5. Configure e-commerce automations
E-commerce automation can take two different shapes including-
- Workflows/automation: These are in the form of abandoned carts, website events, product purchases, etc. To configure these, click “Automation” and then go for “Create Your workflow”.
This presents you with various readymade workflows like product purchase workflows, abandoned cart recovery workflows, welcome message workflows, etc.
You can either choose from these or create a custom workflow. View the actions that will happen in the workflow, customize them as per your needs, and then press “Create” when done. Then go through the steps, set timings for various actions to occur, and then, press the “Activate the Workflow” button.
- Transactional: These take shapes such as sales receipts, order statuses, and shipment confirmations. For configuring these, click through the “Transactional” button. Then follow the steps you’re taken to implement the sending of your e-store’s transactional emails.
Promote Your Shopify Store With Email Marketing!
Now that we’ve walked you through the processes involved in email marketing on the Shopify store, start promoting your e-store using email marketing. There are a variety of email marketing campaigns you can come up with to suit your business goals.
These can help you engage customers and prospects, nurture them, retain them, make them advocate on your behalf, and increase sales and revenue.
Reliable email marketing software can help a lot in this regard. We recommend that you try NotifyVisitors for free! You’ll be happy you did!
FAQs
1. What are the two ways to set up email marketing on the Shopify store?
You can set up Shopify email marketing in two different ways-
- Using the Shopify Email marketing app offered by the Shopify team.
- Using a third-party email marketing software that integrates with Shopify.
2. Why is email marketing important for Shopify stores?
Email marketing can help Shopify stores to achieve their business goals by connecting with customers and prospects, engaging them, nurturing them, retaining them, making them advocate on the e-store’s behalf, and increasing sales and revenue.
3. Is Shopify Email free?
Shopify Email marketing app is offered by the Shopify team. You can use it if you have an active Shopify account and have installed the Shopify Email Marketing app on your account. When you take a Shopify subscription, you’ll get 10,000 emails for free every month. If you send more than this allotted number of emails, you’ll be charged $0.001 per email.


Add comment