


 Email
Email SMS
SMS Whatsapp
 Web Push
 App Push
 Popups
 Channel A/B Testing
  Control groups Analysis
 Frequency Capping
 Funnel Analysis
 Cohort Analysis
 RFM Analysis
 Signup Forms
 Surveys
 NPS
NPS Landing pages personalization
  Website A/B Testing
  PWA/TWA
 Heatmaps
 Session Recording
 Wix
Wix Shopify
 Magento
 Woocommerce
 eCommerce D2C
  Mutual Funds
 Insurance
 Lending
  Recipes
  Product Updates
 App Marketplace
 Academy
Contents
Define User journey
A journey is defined as customizing the campaigns according to each user’s lifecycle stages. In other words, It is a visual campaign builder that lets you create campaigns and engage users with them on the basis of their lifecycle stages. The main objective of the journey builder is to create an omnichannel message experience to the users as they move through different channels at different stages.
Different types of user journeys :
What could be the different stages at which you need to engage users through campaigns and create unique user journeys?
- Onboarding journey: A user onboarding process begins as he subscribes to your services or installs your app. You can create an onboarding journey to engage users on different channels to educate them about your brand and services. Here you can engage them on different channels as and when they use them.
- Promotional journeys: You can build promotional journeys to fetch the attention of the users towards your brands. You can engage users through promotional campaigns at different channels.
- Re-engage journeys: The re-engagement journeys play an important role in fetching your users back to your app or website as they leave your website or leave the carts.
Advantages of creating a user journey :
- Creating a journey is not only about guiding a user at different lifecycle stages through relevant messages and at their preferred channels. But it also opens up a plethora of opportunities for you to retain them and form a long-lasting bond with them.
- You can create each and every journey on the basis of conditions and logic which you will read in the next section. Suppose if a user performs a specific action, then what will be your next course of action. This way you can personalize their experiences on the basis of their past purchasing history, their on-site behaviour and actions, locations, and other factors.
How to create a journey in NotifyVisitors :
NotifyVisitors dashboard enables you to create a journey by defining the blocks and branches.
As we stated above, we create a personalized journey on the basis of a certain logic. Therefore
You can only put logic and allow personalization through various blocks and branches which compose a journey. Blocks refer to the triggers on the basis of which users begin the journey, what actions they perform, and how they change their preferences. Also, blocks contain your preset functionalities on the basis of which you can redefine a user’s experience.
User journey consists of four major points :
- Triggers: Triggers signify the entry points of the users as they begin the journey.
- Actions: Actions refer to the activities the user performs on the website or app and how you can further engage them through personalized campaigns such as push notifications, in-app, web-push, or email.
- Conditions: Conditions are the checkpoints to redefine user experience on the basis of user’s changing preferences and their real-time interactions on the app, campaigns, or website.
- Flow control: Flow control is to evaluate the duration over which users go through a journey and how you can end each user experience on the basis of that duration.
What are the steps to create a journey :
- Define the entry criteria: The very first step in creating a journey is to define the “entry criteria” of the users. You can define a condition according to which only those users will enter the journey who will align with it. This step contains the triggers which are the entry points and conditions which set the context of the journey experience. The triggers help you bifurcate your target audience :
- Events: You can define your target audience on the basis of the event performed by the users.
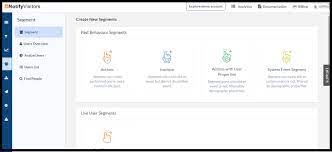
- Segments: You can create segments and include or exclude users from them on the basis of the rules you have set for segmentation.
- Attribute change: Define the audience on the basis of the change in users’ profile attributes.
Note: It means that whenever a user’s actions, preferences, locations match the trigger’s condition, they will enter the journey. Further, you can render a great user experience on the basis of your pre-defined rules
Now let us dive deeper into each of the entry triggers:
- EVENTS: The entry trigger helps you to create a journey on the basis of the events performed by the users on your app or website. Example – It could be a sign-up, or purchase or renewing a subscription. The events mark the beginning of the user journey.
Steps to set-up the event trigger in NotifyVisitors dashboard :
- Go to the left sidebar of the dashboard. Click on the Events under the trigger sections
- Select an event from the dropdown menu.
- Click on the filter icon to add an Event attribute for the selected event.
This way you can bifurcate the targeted audience to a specific group of users who have performed a specific event in reference to the specific event attribute.
Example – Enter only those users in the journey who have performed the event. i.e. installed for your app. After selecting the INSTALL event. Click on the filter icon to add conditions to the event. i.e City includes Noida.
Enter those users who have installed the app from the city which includes Noida.
Further, you can add multiple event attributes such as the operating system, city, platform, and region code etc.and add the attribute value.
- SEGMENTS: This trigger specifies a set of specific users who match the segmentation rules set by you in a segment. In other words, enter those users in the journey who fit into the segments created by you.
Suppose the main purpose of your journey creation is to convert the leads into the customers and you have created a segment of the users: such as users who have similar interests. Therefore you can begin the journey of the user on the basis of different conditions of a segment such as the users who enter, exit, or are within a certain segment.
How to set up the segment trigger in NotifyVisitors dashboard :
- Drag and drop on the enter/exit/in segment block.
- Click on the first drop-down menu to define the context on the basis of which you want to begin a user journey.
- Enter: Begin a user journey as and when they are included in this segment.
- Already in: Begin a journey of those users who are included or are already within the segment.
- Exit: Begin the journey for those users who have been removed from a segment.
As you can see in the above image, only those users will enter the journey who are already in the psychographic segmentation.
- Change in user attribute: The following trigger lets you create a journey for those users who have similar changes in the value of their user profile attributes such as their life-time value, average revenue per user, age group, email address, and so on.
How to set up the change in attribute trigger from the Dashboard :
- Drag and drop on the Change in user attribute block in the dashboard.
- Click on the first dropdown to determine the type of change in the user’s attribute value :
- Select any change: Begin the journey for the users as soon as the user attribute value modifies in the user profile.
- Select specific change: Begin the journey for the users whose attribute value undergoes a specific change in their profiles.
For example: If you have chosen a specific change in the Phone of the user profile. Only those users will enter the journey whose phone has undergone any change.
Further, You can define the specific change with respect to the Phone by selecting the changed attribute value. i.e. new value. For more clarification, check out below what new value or old value refers to :
- New value: The value which is present after the change occurred in a specific user attribute. i.e. Phone.
- Old value: The value which was present before the change occurred on the phone of the users.
- How to engage the users through actions: Action block allows you to engage users in their journey. Before providing personalized experiences to the users, update the user attributes on the basis of the user’s current interactions with you.
How to provide personalized experiences to the users :
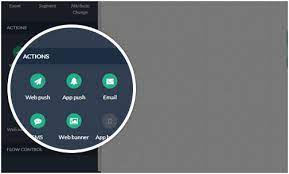
Once you have set the triggers to create a user’s journey, it’s time to engage them through different mediums. For example – If you have entered the users in the journey on the basis of the event performed by them. i.e. app installation, subscription, add the product to the cart. What would be your next course of action? You would send them may be :
- Web push
- App push
- SMS
- Web banner
Let’s see how each of the blocks works :
- Web push: Choose this block to engage users with push notifications to attain the goal of your journey.
For example– When the user installed the app, searched for a product without performing any action. You can engage him through web push notification by offering him discounts on the products which he browsed through or you can ask his feedback as to how was his browsing experience so that you can make changes and help him re-engage.
How to set up web push campaign in the dashboard :
- Simply click on the block of the push.
- Create a new notification or choose from the existing one.
- Add a condition :
- On click: As soon as the user clicks on the push, his journey will start.
- On view: Their journey will continue from this branch. When user views the notification,
- On dismiss: His journey will continue from this branch. As soon as the user dismisses the notification,
- App push: Choose this block to engage users with app push notifications.
For example: Suppose a user has subscribed to your push notifications. Your next course of action would be to send him a push notification for asking him to avail of your services.
How to set up the app push in a dashboard :
- Choose the block: app push.
- Create a notification or either choose from the existing one.
- Add a condition :
- On click: As soon as the user clicks on the notification, his journey continues through the branch.
- On view: As soon as the user views the notification, his journey continues through the branch.
- Email: Choose this block to engage users through email campaigns as and when required in their journey.
For example – Suppose a user has viewed the page and added the product to the cart but left it in the meanwhile maybe the checkout process could be long or maybe the delivery charges could be much higher to deal with. You can engage him right away with a reminder email with a surprising offer that pulls him back to the cart.
How to set up email block in a dashboard :
- Click on the email block.
- Create an email. Fill in the details of the sender name, his address or add a label
- Add conditions :
- On click: As soon as the user clicks on the email his journey begins through the branch.
- On open: As soon as the user opens on the view, his journey will begin through the following branch.
- SMS: Choose this block to engage users with SMS or personalized text messages.
For example – Suppose the user has viewed the product and has not performed any specific action on it. You can engage him via a personalized SMS by showing him the offers he can get on the said product.
Click on the SMS block to begin a user journey by sending the user personalized text messages as soon as the users click on the text messages.
- Whatsapp: The block enables you to reach the end goal of your journey by engaging users with Whatsapp campaigns.
For example –
- Whatsapp can be used as an engagement channel in any case the user buys or searches the product from any channel- be it app or website. You can send promotional messages or engage users with great offers and discounts. Also, if a user has purchased the product, you can send him the link through which he can track the location of his purchased product.
- You can provide product delivery updates to the users through WhatsApp.
How to set WhatsApp campaign in the dashboard :
- Click on the WhatsApp block to create a campaign or choose from the existing one.
- Add labels or personalization.
- Choose the frequency of the messages as in no. of messages users will receive in a day, or a week.
- Web banner: This block enables you to engage users with web banners.
For example – If a user subscribes to your services, you can engage him through promotional offers via web banners, so that he could be aware of what offers you provide them.
How to set up web banners in the dashboard :
- Click on the web banner block.
- Create a new banner or choose from the existing one.
- Add the condition :
- Time duration: Set the time duration in days that allow the users to view the banner within that specific time duration.
3) How to set up conditions :
Conditions are the checkpoints that help you personalize a user journey on the basis of their behaviour and preferences in real-time. You can create different flows for the users using the blocks which work on a yes or no logic. Check out the below blocks to create different flows :
- When users are included within a segment.
- When they have performed an event.
- Users have a specific user attribute.
- When they are reachable on a channel.
- When they will perform an event.
Let us check out how to configure each block :
- Is in a segment: Create a journey for each user by checking whether they are included within a segment or not.
For example – Suppose the user has viewed a product on your webpage. First of all, check if the user is in a segment that is created by you. Add him into that segment and send him a web push so that he can perform a specific action on it. i.e. purchase the product.
How to set up the block in the dashboard :
- Click on the event block and select the event performed by the user.
- Check out the conditions of the “in segment” block. See if the user is browsing on the basis of the interests and lifestyles. You can check it out through the feedback surveys.
- Engage him with push notifications across the channels he is available at.
Note: Check yes or no for an action or the trigger, then take the subsequent actions.
- Has done an event: This block helps you to check whether a user has performed an event.
For example – You have sent the visitor an email after he browsed through a product. Now your main goal is to turn him into a subscriber. It can only happen when he opens the mail and clicks on the subscription link If he doesn’t perform the desired action. You can send him a web push instead to fetch his attention immediately after waiting for one week.
Note: You can add condition at any stage and set the trigger time too.
How to set up the “has done the event block ‘’:
- Drag and drop on the “have done the event” block.
- Check if they have done the event or not by clicking on yes or no. Take further action accordingly.
- Check user attribute: This block allows you to check whether there is a specific change in the selected user attribute value or not. Specify the condition and take further action.
For example: In the “sale” event, you can continue the journey of only those users who fall into the gender category of “men”. You can decide your further course of action by sending product recommendations only to the users who fall into the category of men to attain your end goal of a journey.
How to set up the check the user attribute :
- Drag and drop on the “check the user attribute”.
- Select yes for the users whose attribute value has undergone a change and no for the users where there is no change in the attribute value.
- Reachable on channel : This block enables you to check out whether the users are reachable across a channel or not. It is necessary to use this block before engaging users through different channels. You can this way identify to reach the users through another channel if a user is not reachable within one channel.
For example – A user has viewed a landing page and browsed through a product. See if he is reachable within the channel such as email and send him an email campaign.
How to configure it in the dashboard :
- Drag and drop the “Is user reachable block”.
- Select the channels to engage him. Click on yes if he is available or clicks on no if he is not available on the channel to let them experience the next block. Take a further course of action.
- Wait for an event: This block enables you to take your further course of action after an event has happened.
For example- For example, if a user has viewed the page and browsed through the products. As a result of the occurrence of this event, you sent him an email to recommend him to the product which he browsed through. You will wait for the occurrence of the event then only you can take your further course of action on the users so that they can continue with the process. If he doesn’t open the email, wait for a time period of 2 days and send him a push campaign.
How to set up this block in the dashboard :
- Drag and drop on the “wait for an event” block.
- Select the event and add the attributes for it.
- Click on yes, if the users perform the desired event so that they continue with the journey.
- Click on no, if the users didn’t perform the event.
4) Flow control: The flow control enables you to end the journey experience of the users. It helps you evaluate the duration of the user journey and end it for each and every user.
What all you can perform under the flow control block :
- You can stop the flow of the journey.
- Publish a journey.
- save a journey.
- How can you stop the flow of the journey :
Go to the left sidebar of the panel, Select the STOP FLOW under the Flow control section to do the same.
- When can you publish the journey :
Once you have created a journey, you can activate it. Remember,it will only go live, the moment it is published.
Points to remember before publishing the journey :
- Remember to configure all your steps.
- At least one of your triggers must be active.
- All blocks must be connected to at least one other block.
Implications of Publishing :
- Once you publish your journey, you cannot edit it. Only certain steps are readable such as the content of the campaigns.
- You can view the stats of the journey only after it’s published.
- You can track any of the users with its user id.
- When you stop a journey: You can either stop the entry of new users and process the existing ones or you can stop an entire journey.
Mapping a journey actually helps you gain useful insights about your customer pain points. Also, you can enhance customer experience by defining each step of journey through their actions on your website. Further, you can take subsequent actions to target them.

