Email
Email SMS
SMS Whatsapp
 Web Push
 App Push
 Popups
 Channel A/B Testing
  Control groups Analysis
 Frequency Capping
 Funnel Analysis
 Cohort Analysis
 RFM Analysis
 Signup Forms
 Surveys
 NPS
NPS Landing pages personalization
  Website A/B Testing
  PWA/TWA
 Heatmaps
 Session Recording
 Wix
Wix Shopify
 Magento
 Woocommerce
 eCommerce D2C
  Mutual Funds
 Insurance
 Lending
  Recipes
  Product Updates
 App Marketplace
 Academy


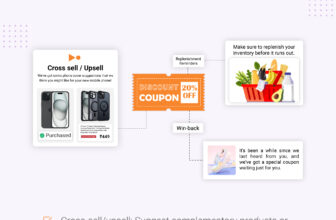
This guide walks you through creating automated, recurring campaigns using NotifyVisitors to wish user birthdays and wedding anniversaries along with related products. These campaigns are ideal for increasing engagement, strengthening emotional connections, and driving business outcomes such as loyalty, conversions, and upsells.
Table of Contents
Campaign goals
This recipe supports four distinct use cases with engagement objective. Choose the one(s) that align with your goals:
| Use Case | Goal |
|---|---|
| Birthday / Anniversary – Today | Delight users, foster emotional connection, and increase daily engagement |
| Birthday / Anniversary – Next Week | Build anticipation, encourage early interactions or conversions |
| Birthday / Anniversary – This Month | Nurture ongoing engagement throughout the month |
| Anniversary – Next Month + High Value | Reward loyal users, cross-sell premium offerings, and grow customer value |
Required data & attributes
To power these campaigns, ensure the following user attributes and event data are available in your system:
User Attributes
- ›
birth_date - ›
wedding_date
Events
- ›
transaction_success(will be used to identify high-value customers)
Step-by-step process
To create personalized and automated campaigns, we’ll follow this straightforward two-step process:
- Define Targeted User Segments – Create precise audience segments based on upcoming special dates (today/next week/this month).
- Design Recurring Automated Campaigns – Set up campaigns with personalized product recommendations that automatically trigger based on segment criteria.
Step 1: Create user segments
To create a segment, navigate to the Segments section, select the segments tab, and click on Create New Segment. Then select the “Actions with User Properties” option to enter the segment creation interface. Here click the “Add User Property” button. From the attribute dropdown, select birth_date or wedding_date.
Next, we’ll define condition rules based on the campaign use case.
Case 1. Birthday / Wedding Anniversary Greeting [Today]
This is the case where we’ll wish the user on the exact date of their birthday or anniversary.
For this, set the condition to today as shown in the image below.
![Case 1. Birthday / Wedding Anniversary Greeting [Today]](https://productscdn.notifyvisitors.com/recipes/wp-content/uploads/2025/09/24111210/image-19.png)
This ensures the campaign runs only for users whose special day is today.
Case 2. Birthday / Wedding Anniversary [Next Week]
This is where we engage users one week before their special day.
For this, set the condition to in the next range. Input range: 7 to 14 days.
![Case 2. Birthday / Wedding Anniversary [Next Week]](https://productscdn.notifyvisitors.com/recipes/wp-content/uploads/2025/09/24111704/image-2.png)
This targets users whose birthdays or anniversaries are coming up next week.
Case 3. Birthday / Wedding Anniversary [This Month]
This is where we engage users whose special day falls later in the month.
For this, set the condition to in the next range. Input range: 0 to 30 days.
![Case 3. Birthday / Wedding Anniversary [This Month]](https://productscdn.notifyvisitors.com/recipes/wp-content/uploads/2025/09/24112721/image-20-1024x529.png)
This approach creates sustained engagement throughout the month.
Case 4. Wedding Anniversary [Next Month] + High-Value Customers
This strategy targets your top-tier customers whose anniversaries are approaching next month.
For this, choose wedding_date from the attribute dropdown. Set the condition to in the next range. Input range: 15 to 45 days.
Events/Actions performed (High-Value Filter):
- Add a behavior condition Users who “did performed”.
- Select event: transaction_success.
- Time period: In the last 90 days.
- Count: Greater than or equal to 10.
![Case 4. Wedding Anniversary [Next Month] + High-Value Customers](https://productscdn.notifyvisitors.com/recipes/wp-content/uploads/2025/09/24114507/image-4-1024x479.png)
This segment captures users who have upcoming anniversaries next month and have demonstrated loyalty through 10+ recent transactions.
For all segments, ensure the “Precomputed Segment” option is enabled. This keeps your audience up-to-date by automatically including new users who meet the criteria and removing those who no longer qualify.
After setting the rules: Click Create. Name your segment clearly (e.g., “Birthday Today – Greeting Campaign”). Click Publish to activate the segment. You’re now ready to use these segments in your campaigns!
Step 2: Create recurring birthday & anniversary campaigns
After setting up your segments based on user attributes (e.g., birthday, wedding anniversary), the next step is to create recurring campaigns that automatically deliver timely, personalized messages across your chosen channels.
Refer to the table below for the appropriate recurrence schedule settings for each scenario:
| Use Case | Schedule Option | Day | Time | Notes |
|---|---|---|---|---|
| Birthday / Anniversary – Today | Daily | – | 9:00 AM | Sends greetings on the exact date; high day-of engagement |
| Birthday / Anniversary – Next Week | Weekly | Monday | 9:00 AM | Ideal for building anticipation early in the week |
| Birthday / Anniversary – This Month | Monthly | 1st | 9:00 AM | Ensures users are engaged early in the month |
| Anniversary – Next Month + High Value | Monthly | 15th | 2:00 PM | Avoid overlap with regular anniversary campaigns; perfect for premium messaging |
For this example, we will concentrate on the email channel, which is the most commonly used and effective option for these types of campaigns. Nevertheless, the same strategies can be utilized for WhatsApp, SMS, and push notifications if you wish to incorporate those channels as well.
To begin, navigate to the Segments section. Locate the segment you’ve created (e.g., “Birthday Today” or “Wedding Anniversary Next Month”). Click on the three-dot menu next to your segment. Select “Campaigns” from the dropdown.
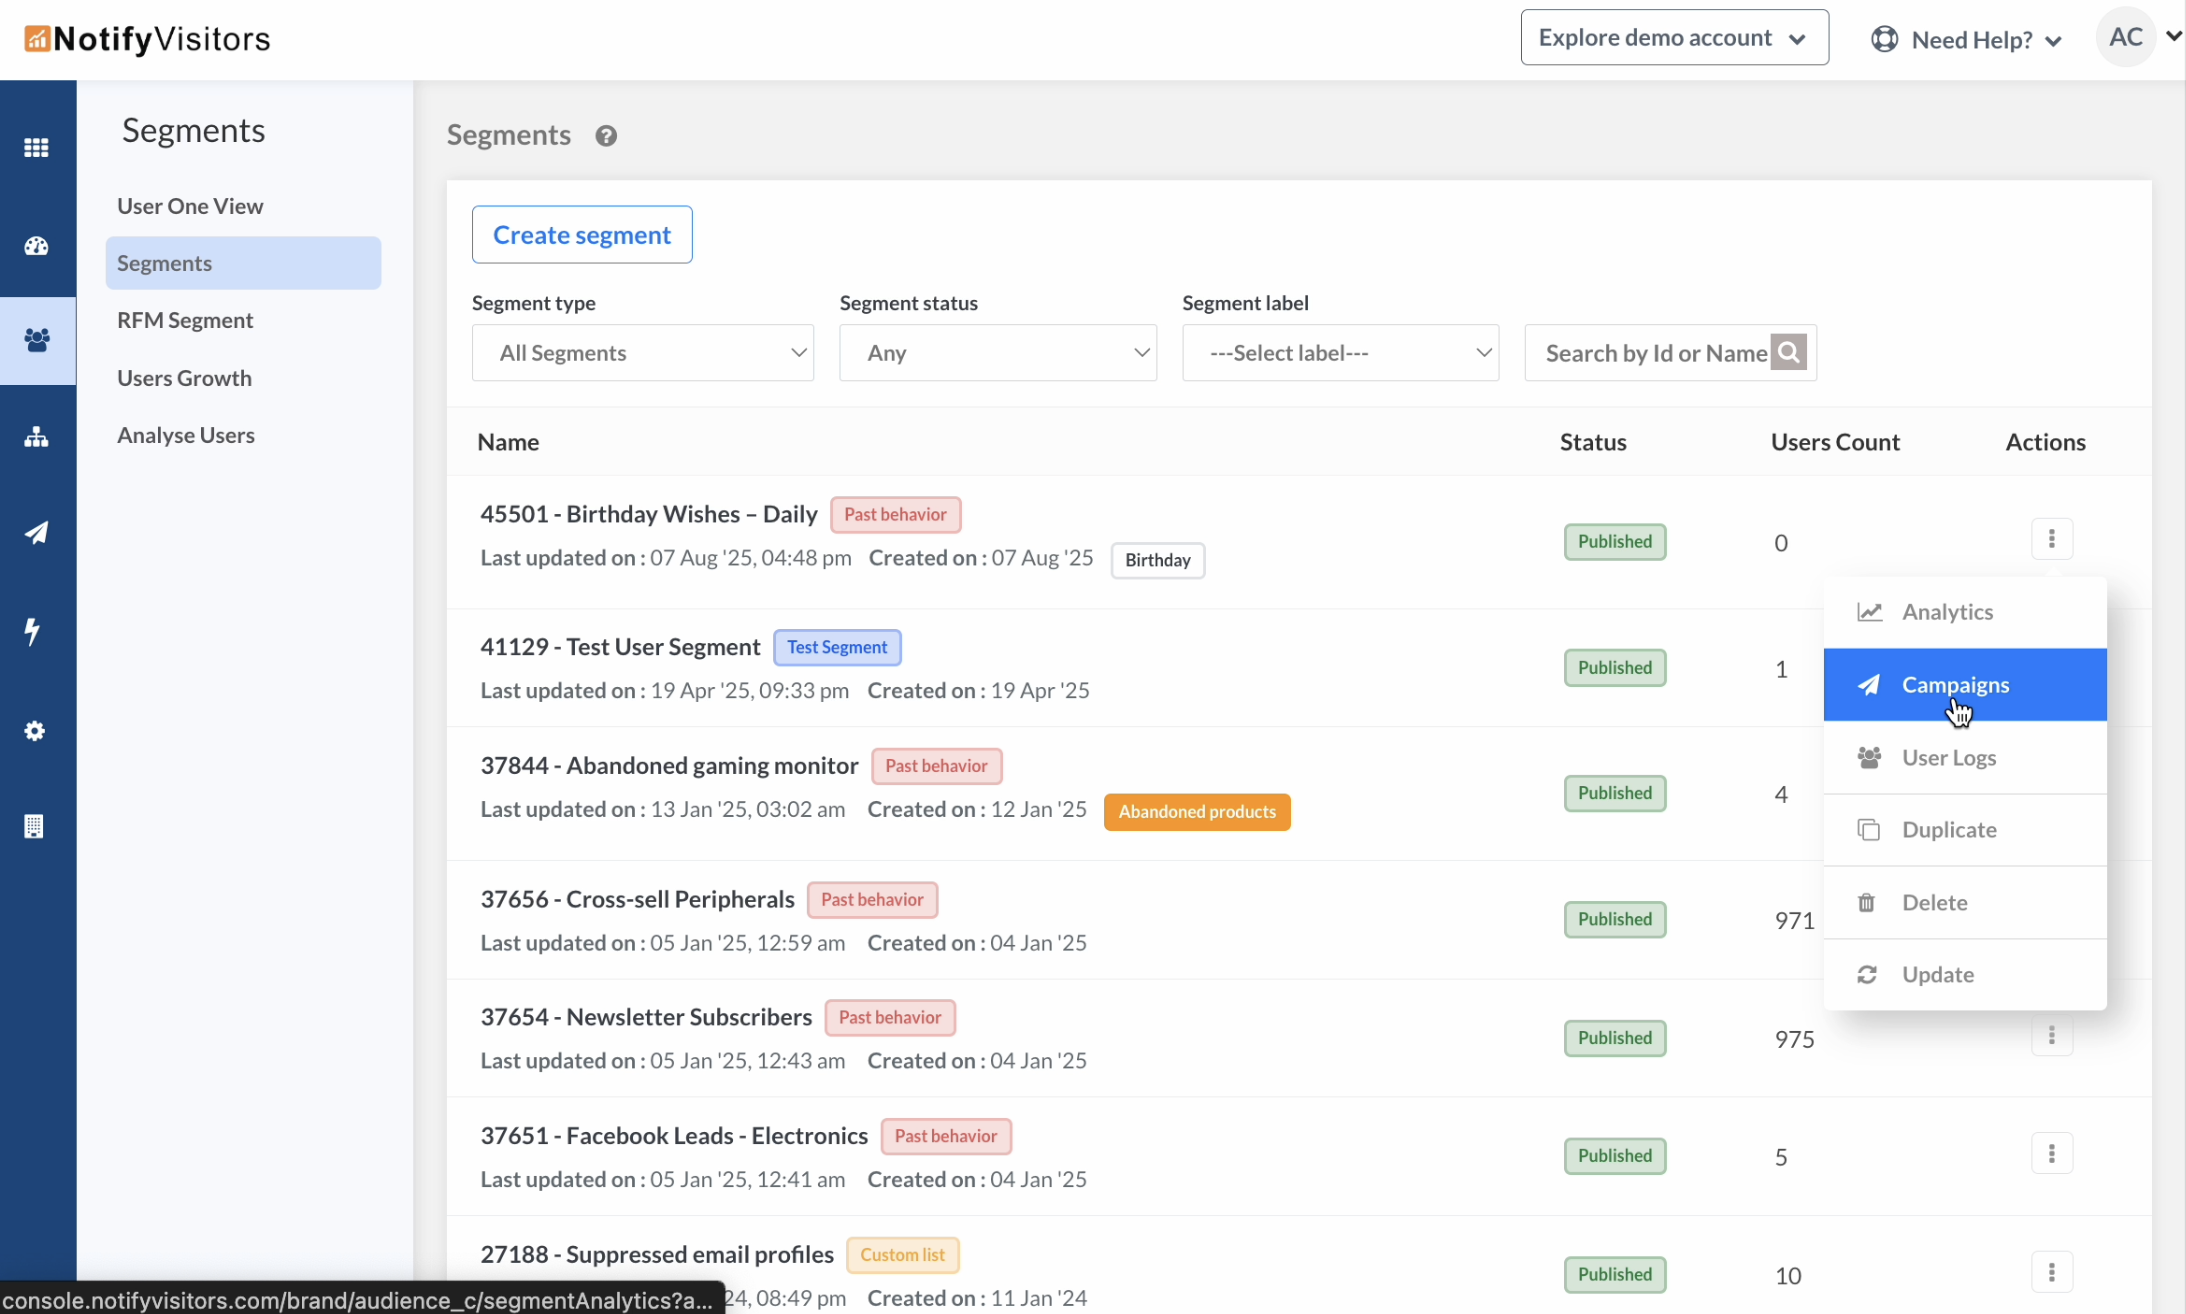
Choose Email as your channel. This will open the campaign creation wizard.
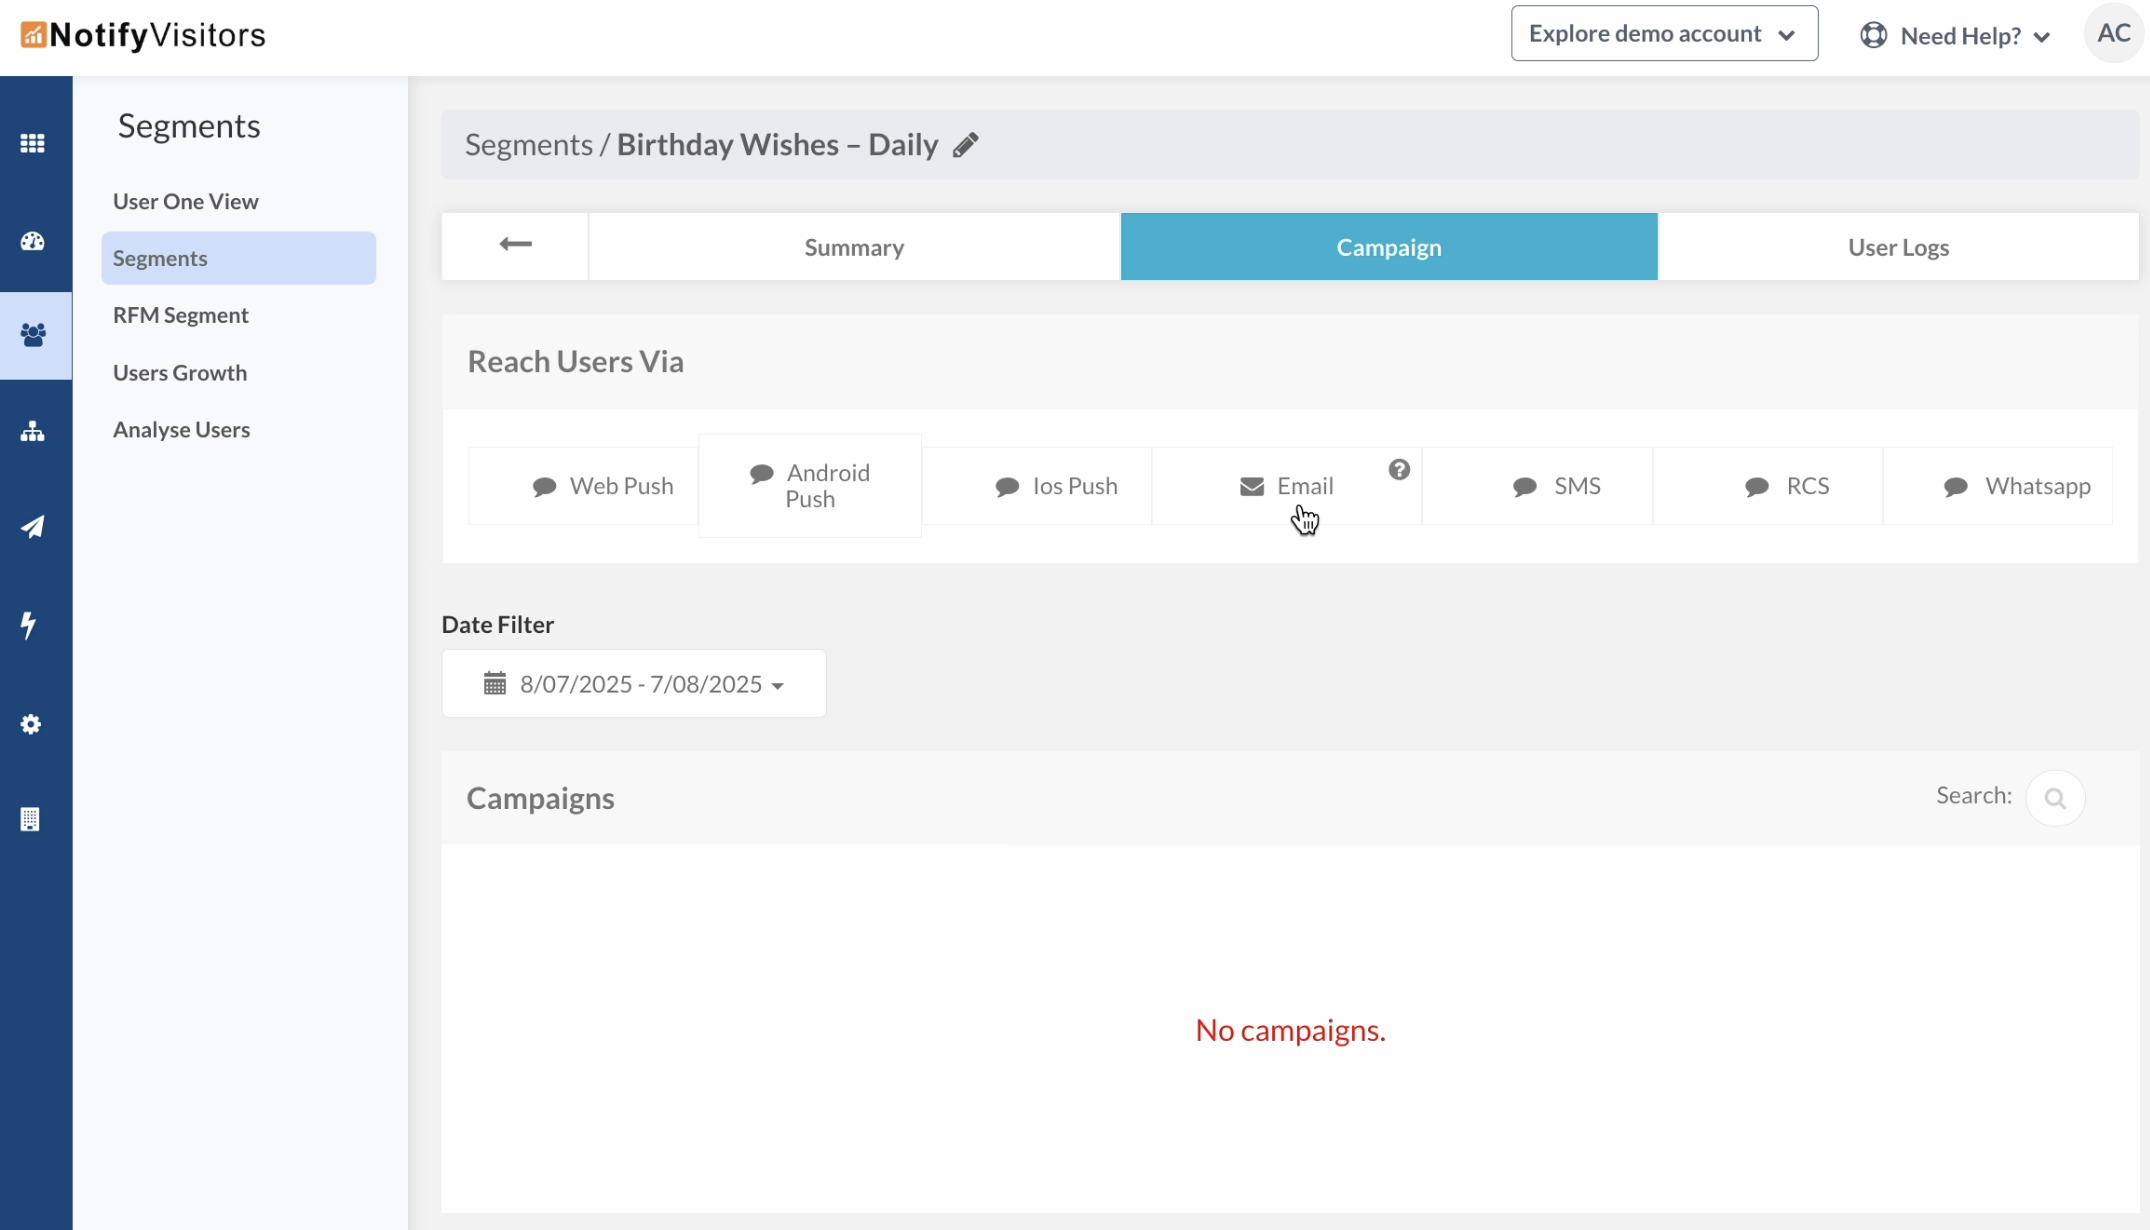
Follow the steps or click here for the detailed tutorial.
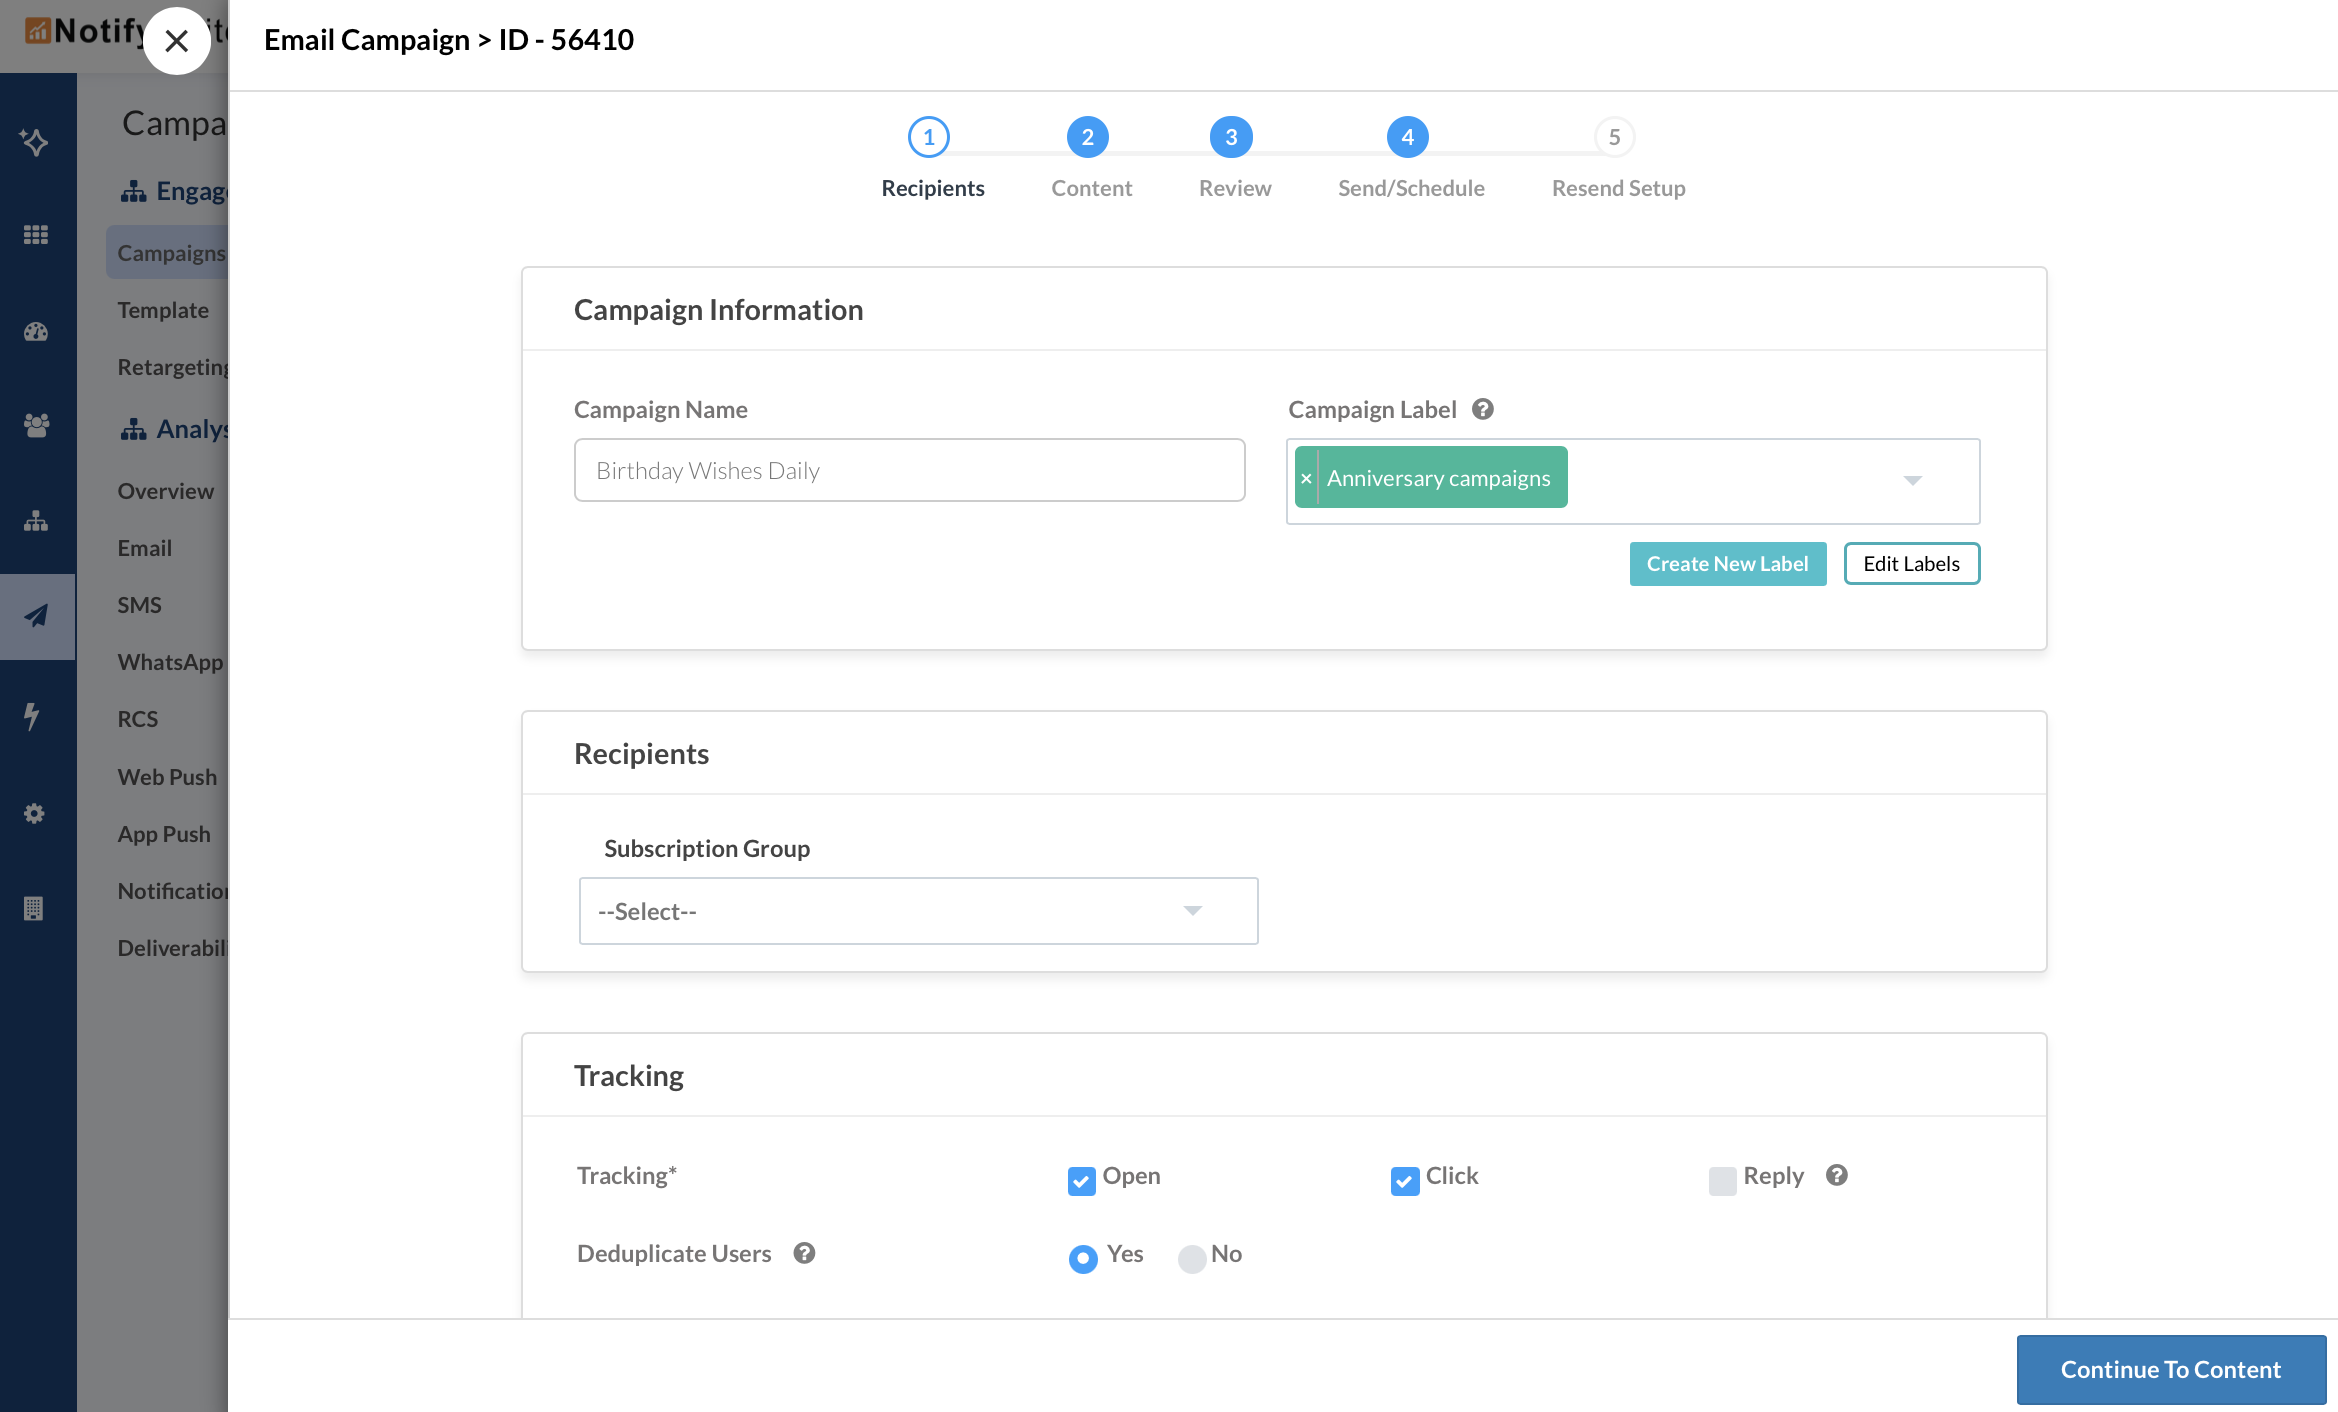
Tab 1 Recipients: On the first page, fill in the required details like campaign name, label (like anniversary campaigns; optional but highly recommended as this will be used to filter analytics), and tracking options.
Tab 2 Content: On the second page, start by filling in the necessary details like the subject line, sender name, and more. Then, choose how you’d like to design your email campaign, whether it’s with rich text, custom HTML, or the drag-and-drop editor.
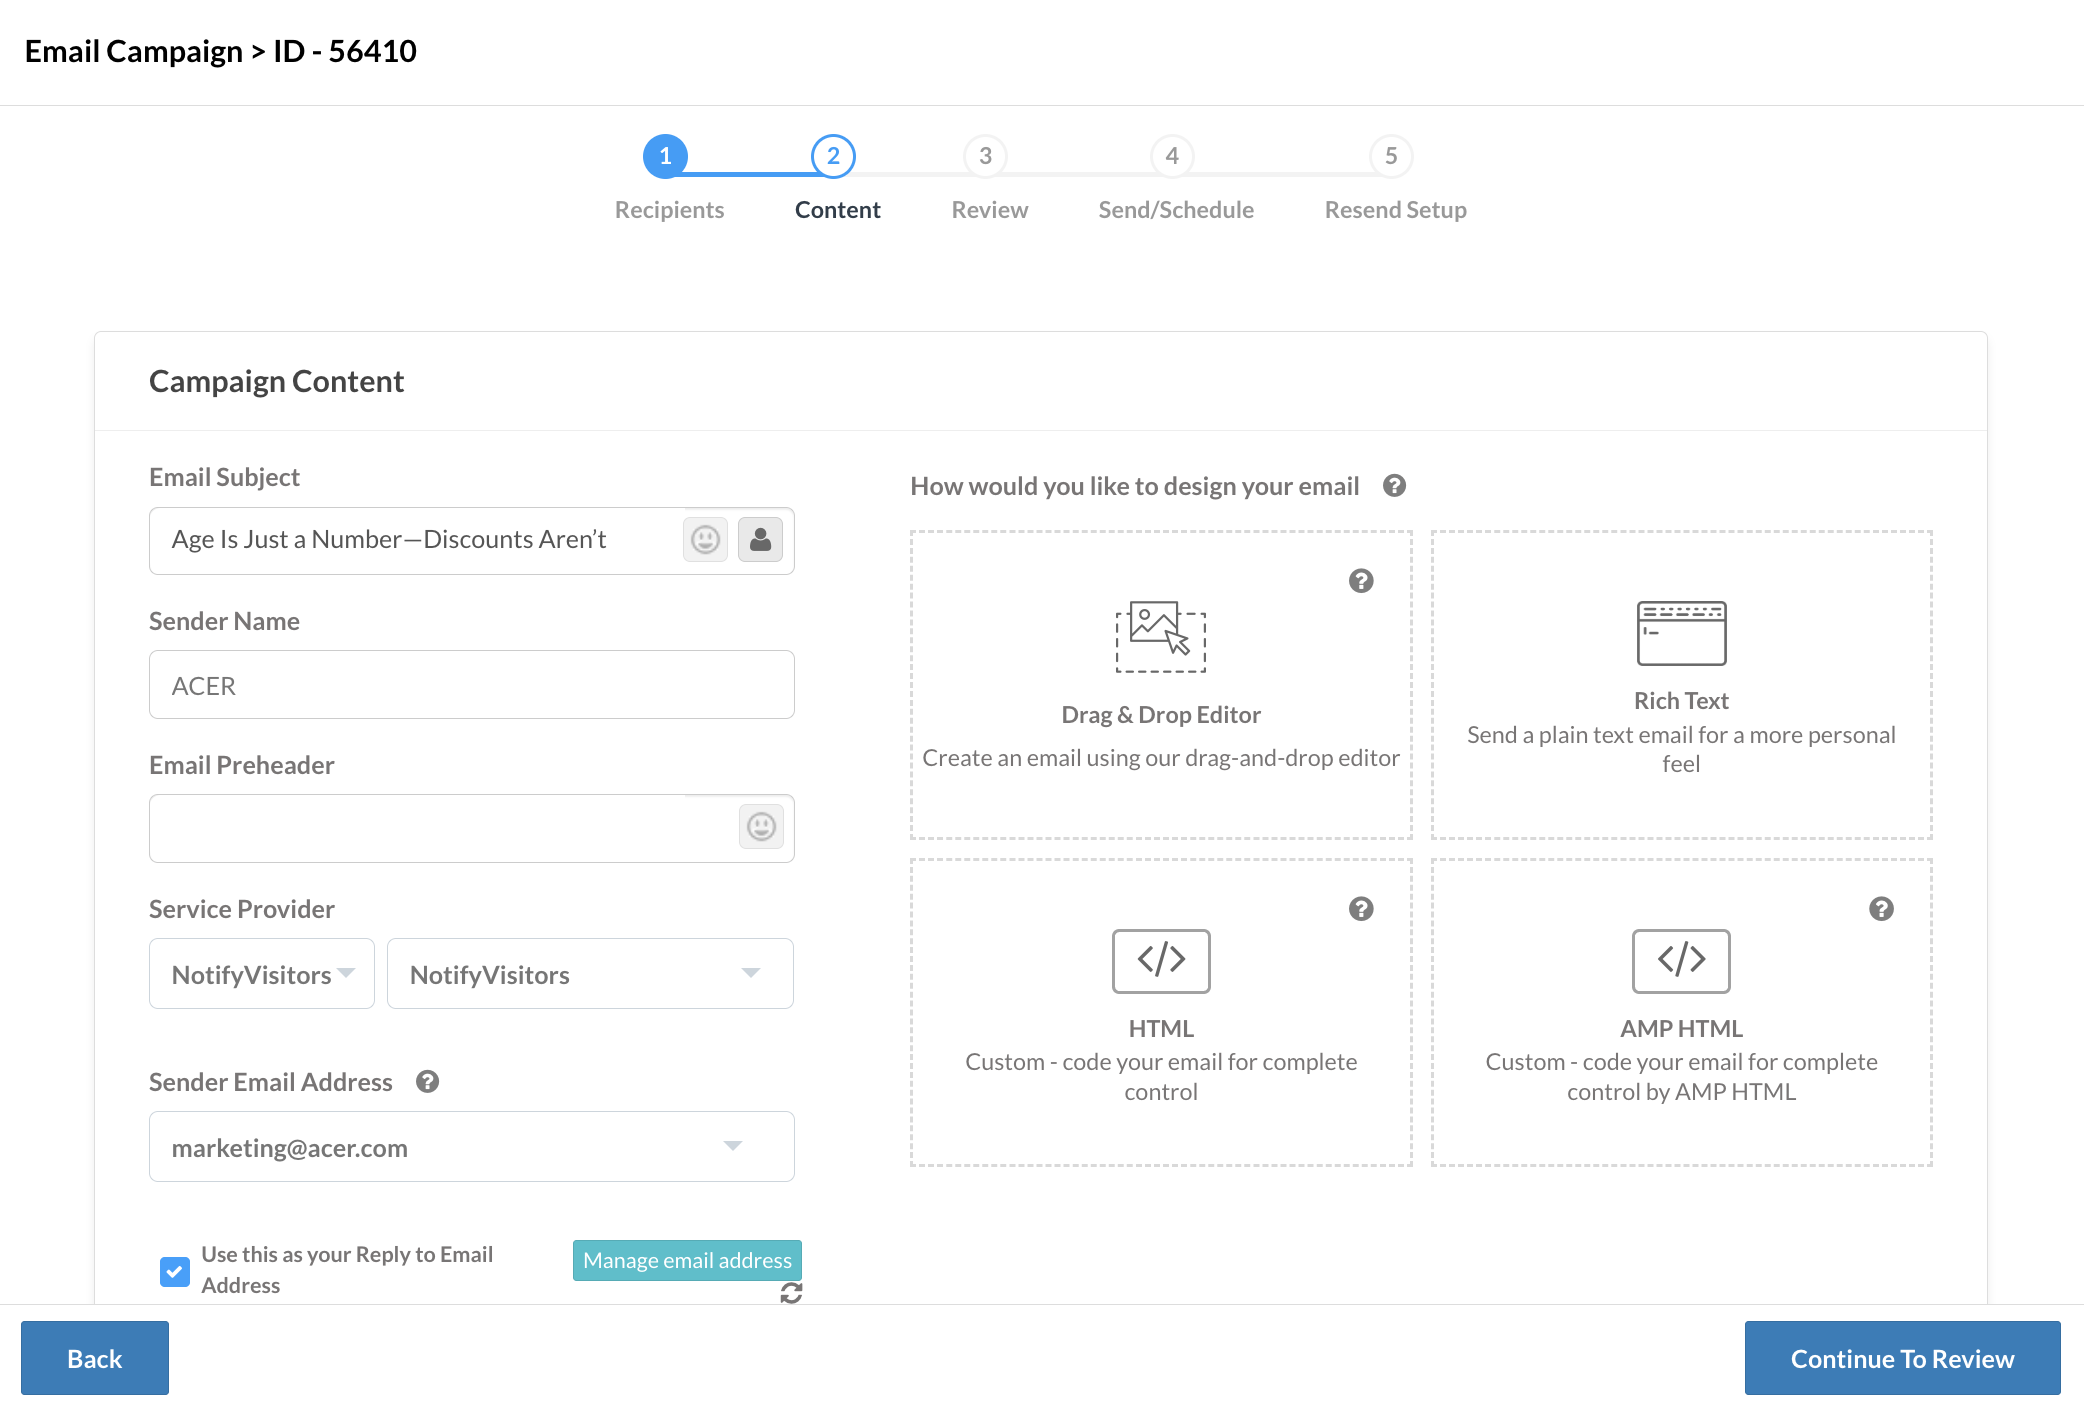
We suggest going with the drag-and-drop editor, as it includes ready-to-use birthday and anniversary templates that make creating your campaign much easier.
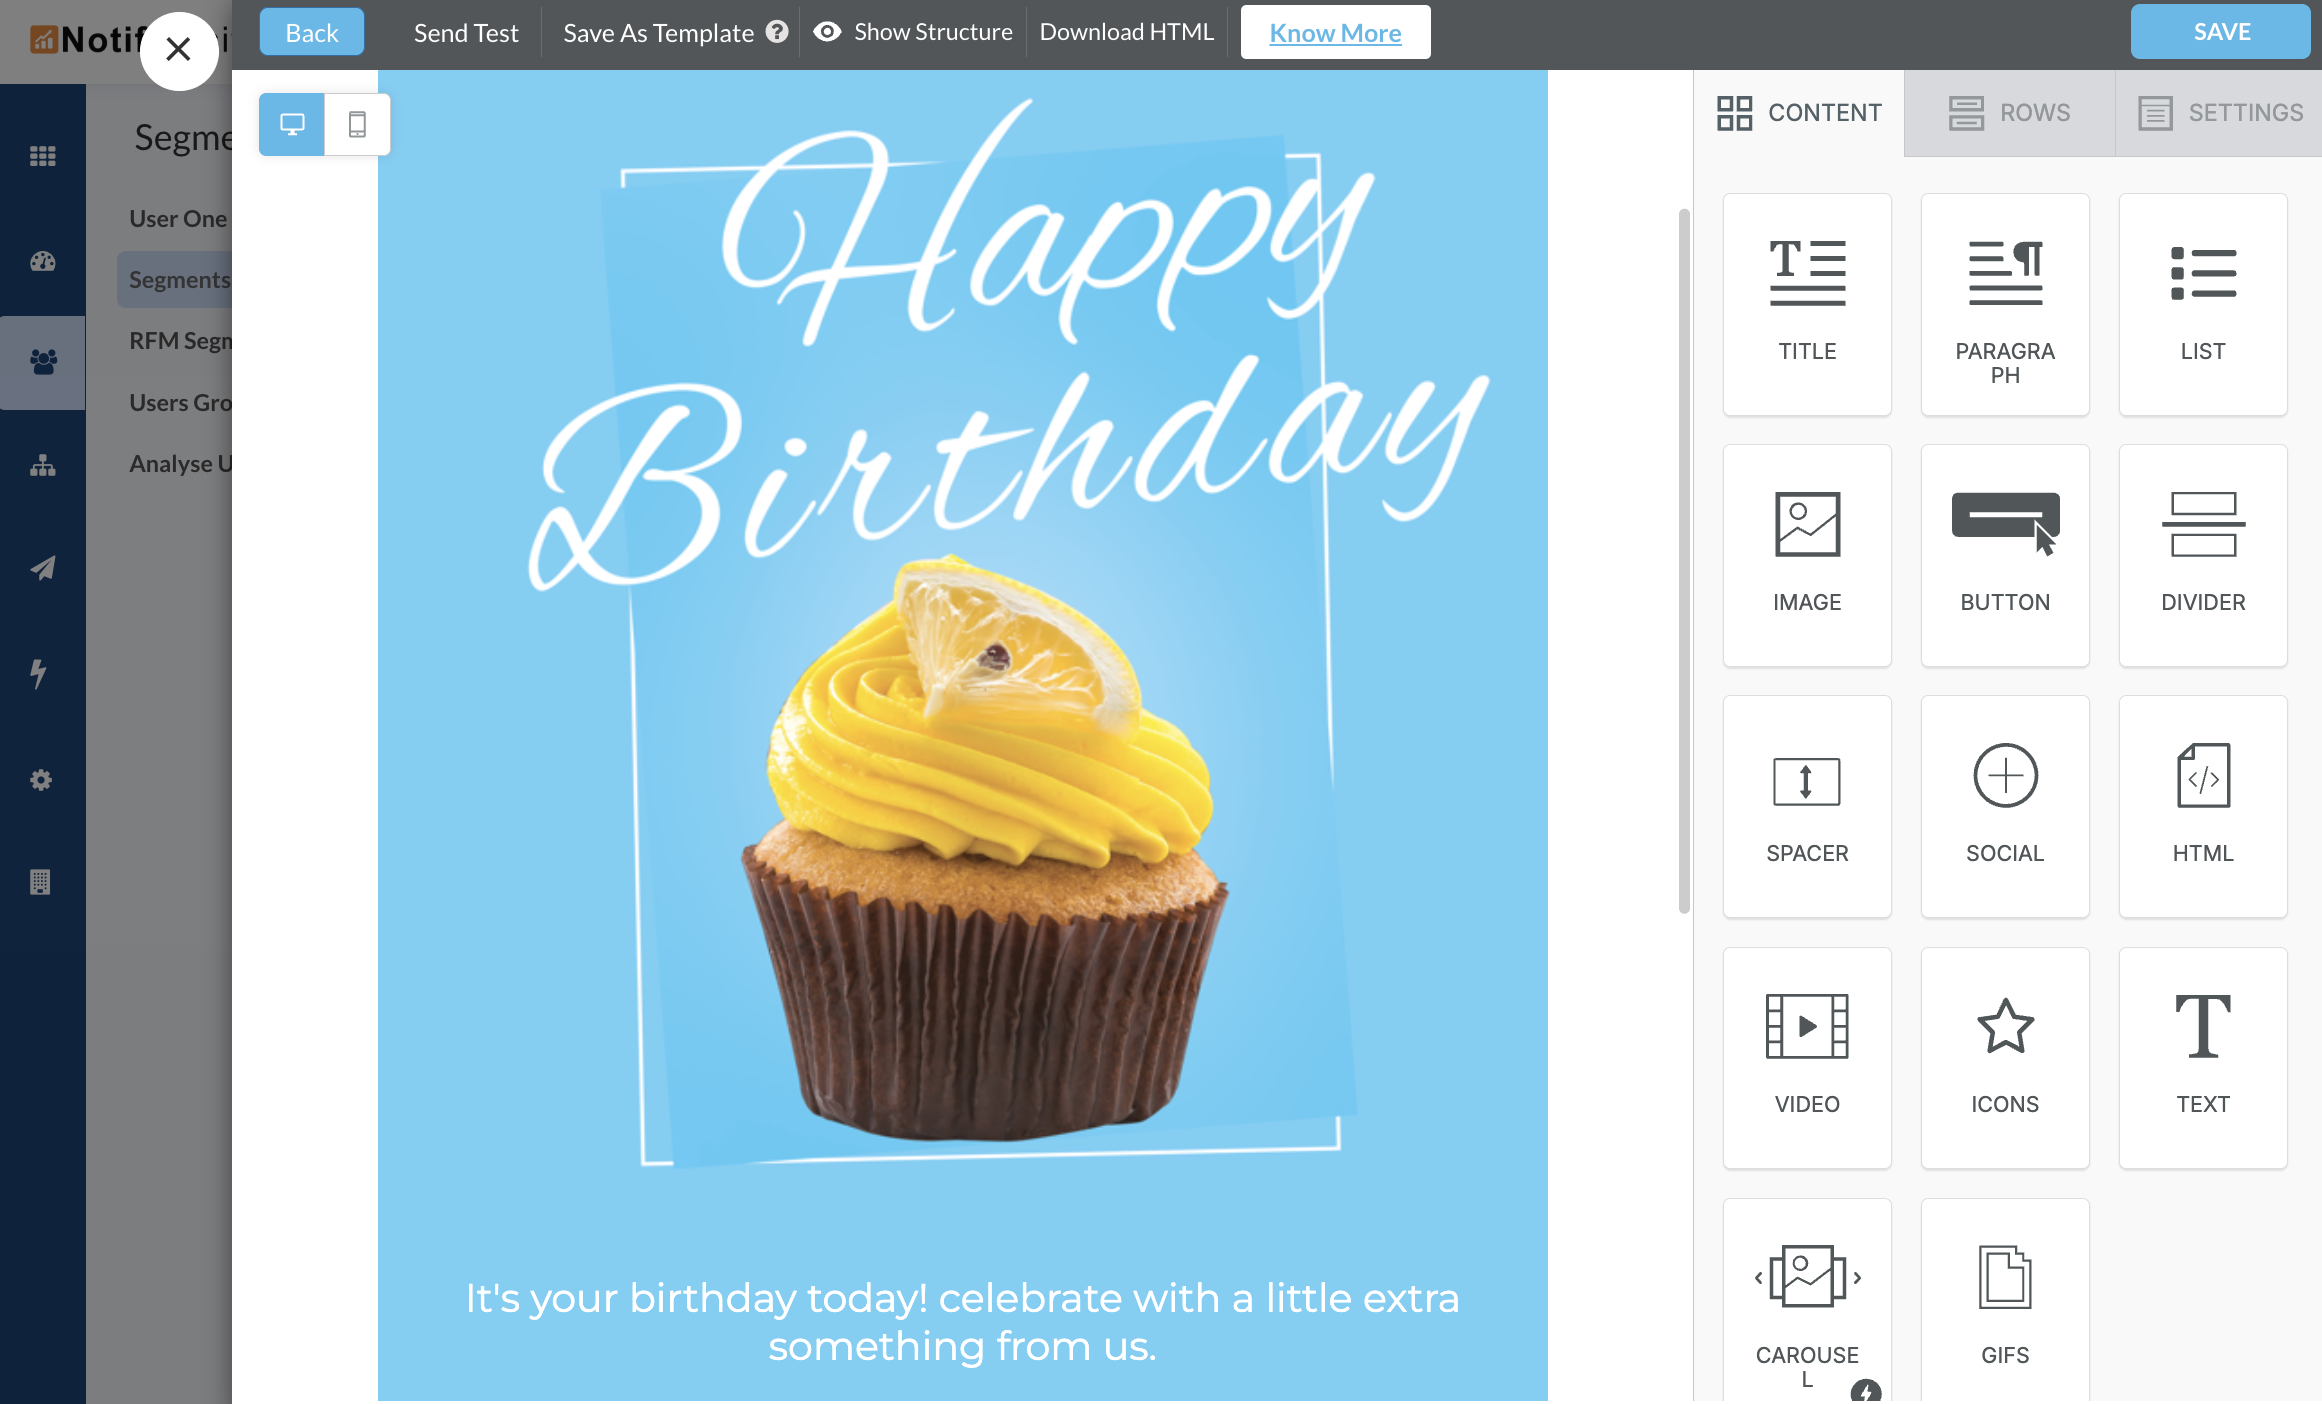
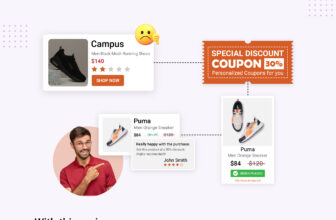
If you’re looking to do more than just send wishes, like recommending products related to birthdays or anniversaries, the drag-and-drop editor has you covered there too. It lets you personalize product suggestions for each user with ease. To learn how to set this up, just click here.
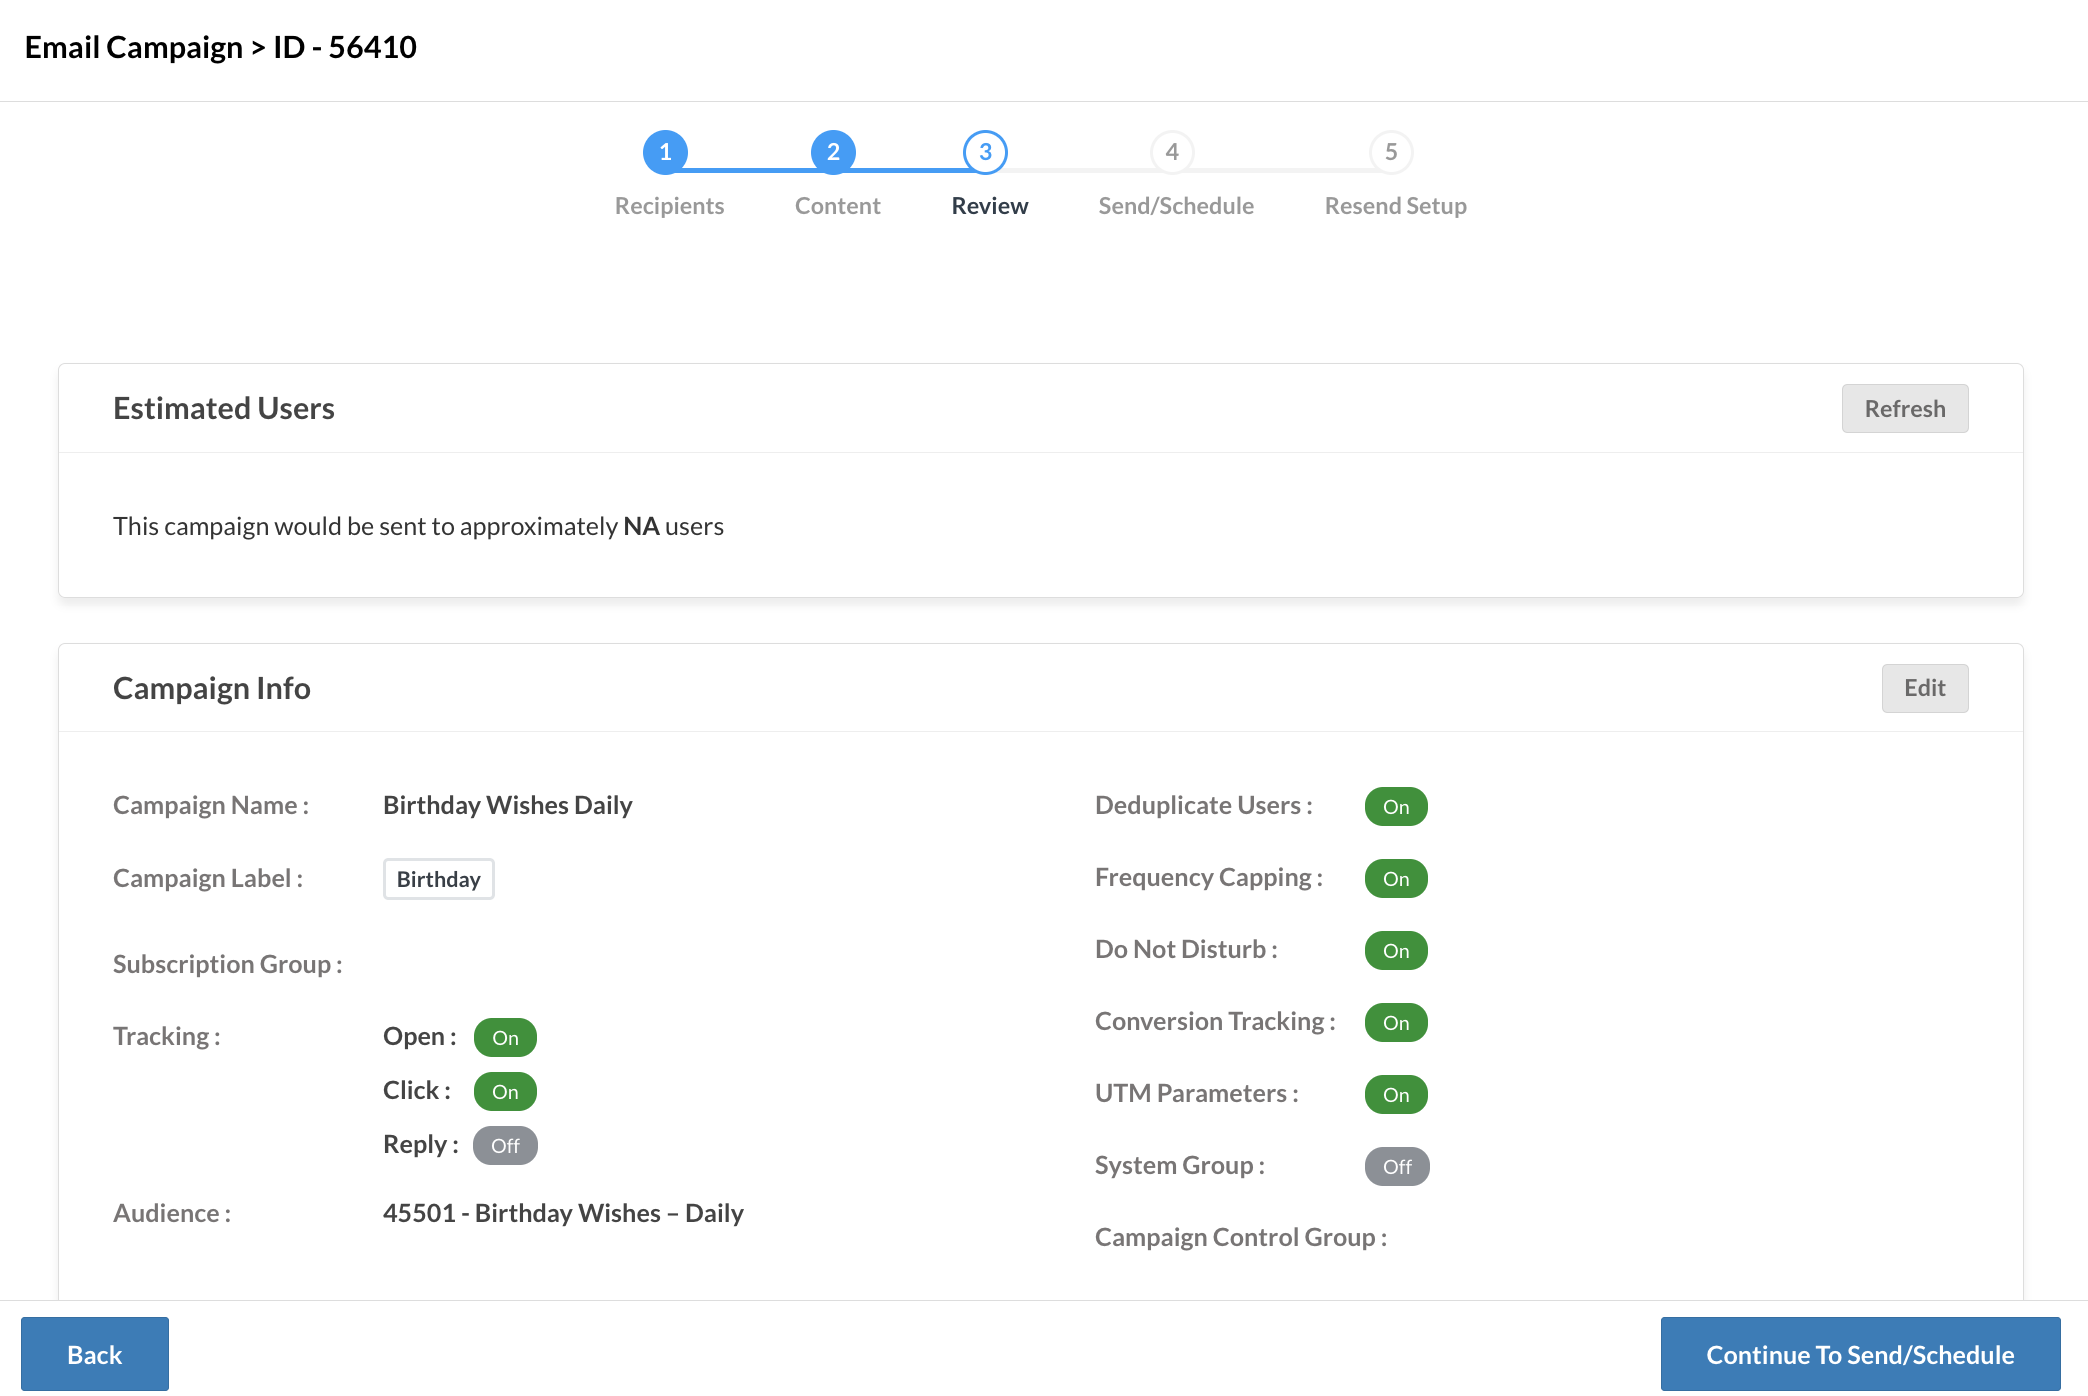
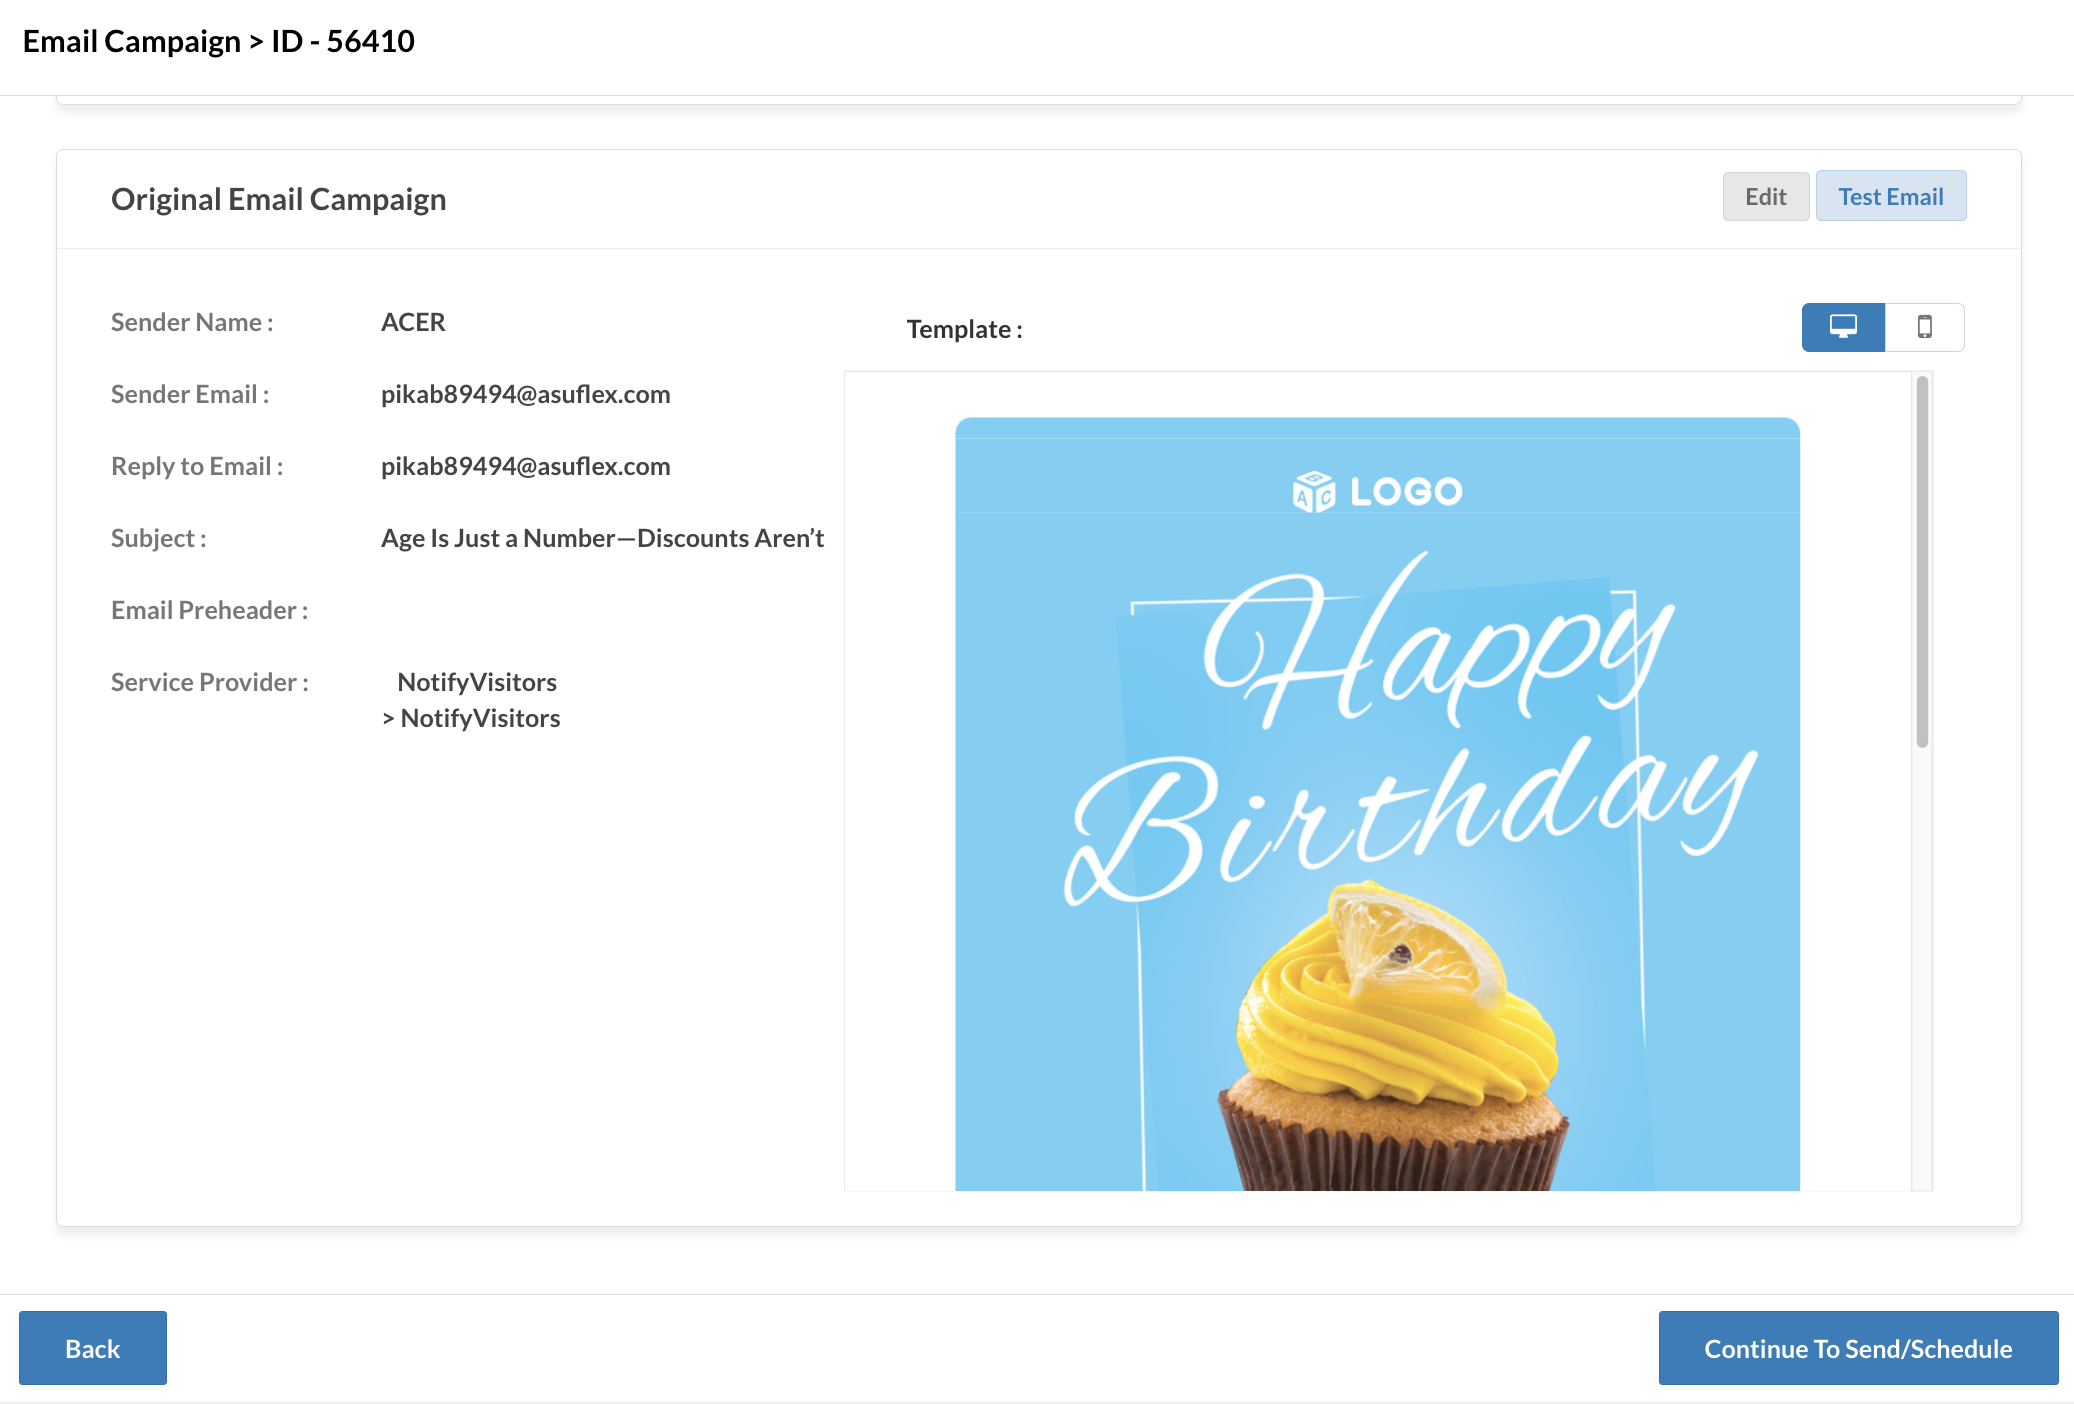
Tab 3 Preview & Testing: On this tab, you can review your entire campaign before sending it out.
You also have the option to send a test email to yourself or your team to double-check the formatting, personalization, and links. Be sure to preview the email for both mobile and desktop to make sure it looks great on all devices.
Tab 4 Send/Schedule: On this tab, set your campaign to Recurring to make sure it’s automatically sent according to the segment’s logic. In the schedule section, change the status to “Active” and set the frequency as per the scenario table mentioned above. For instance, let’s set the schedule to “Daily” and choose either 12 AM or 9 AM—depending on whether you want to send wishes at midnight or during business hours.
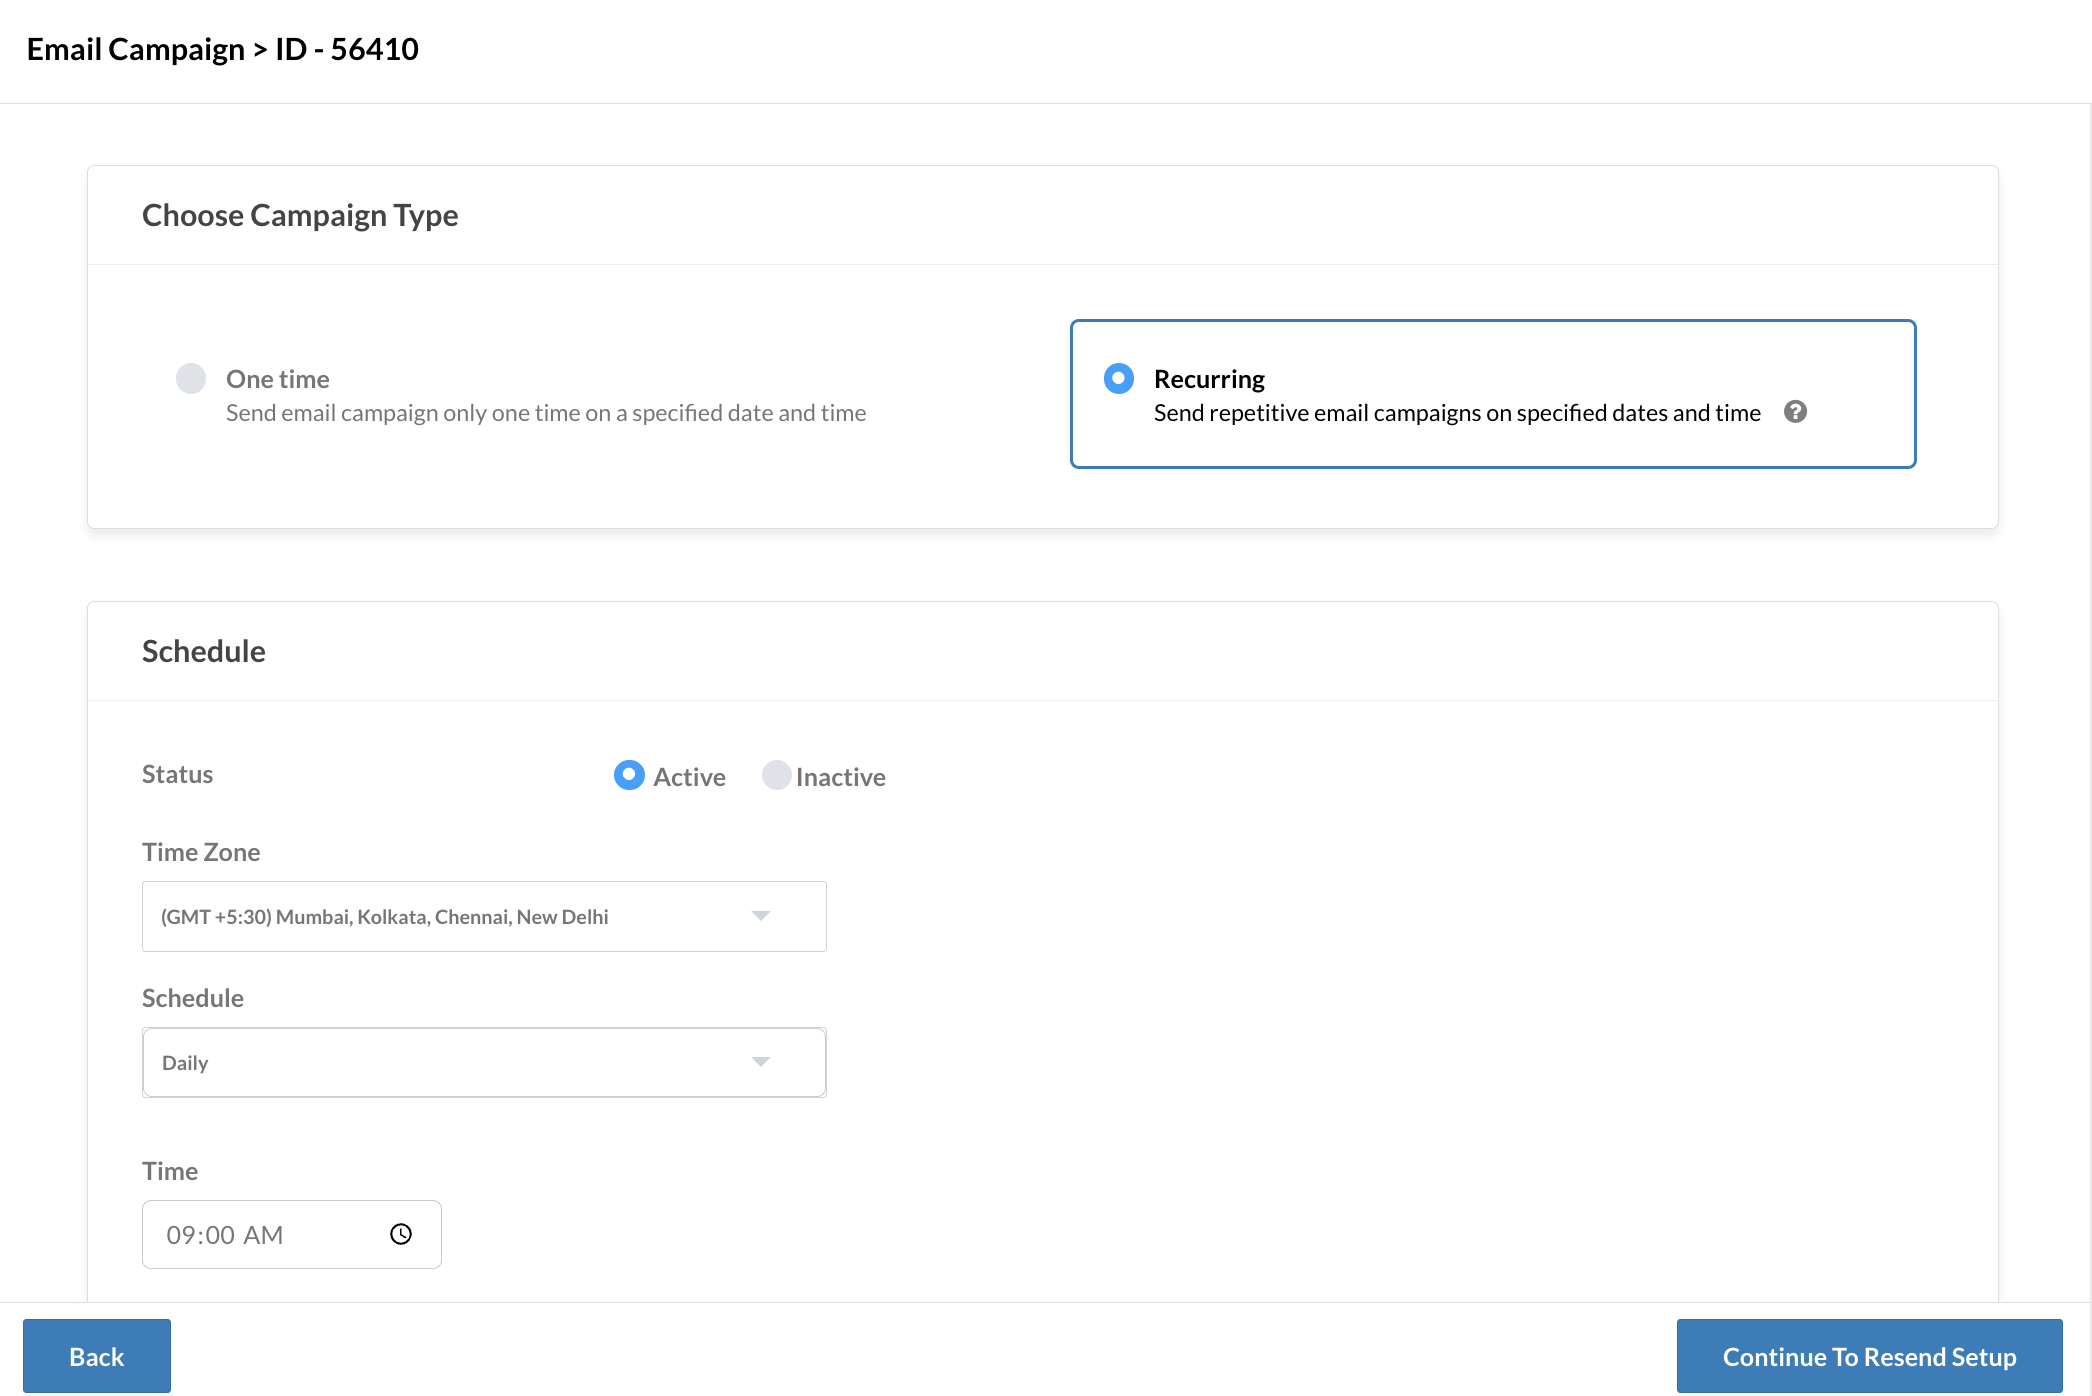
This setup ensures that birthday or anniversary campaigns are sent out automatically.
Monitoring campaign performance
Simply sending out campaigns isn’t enough anymore—understanding how they’re performing is key to knowing what’s working and where you can improve.
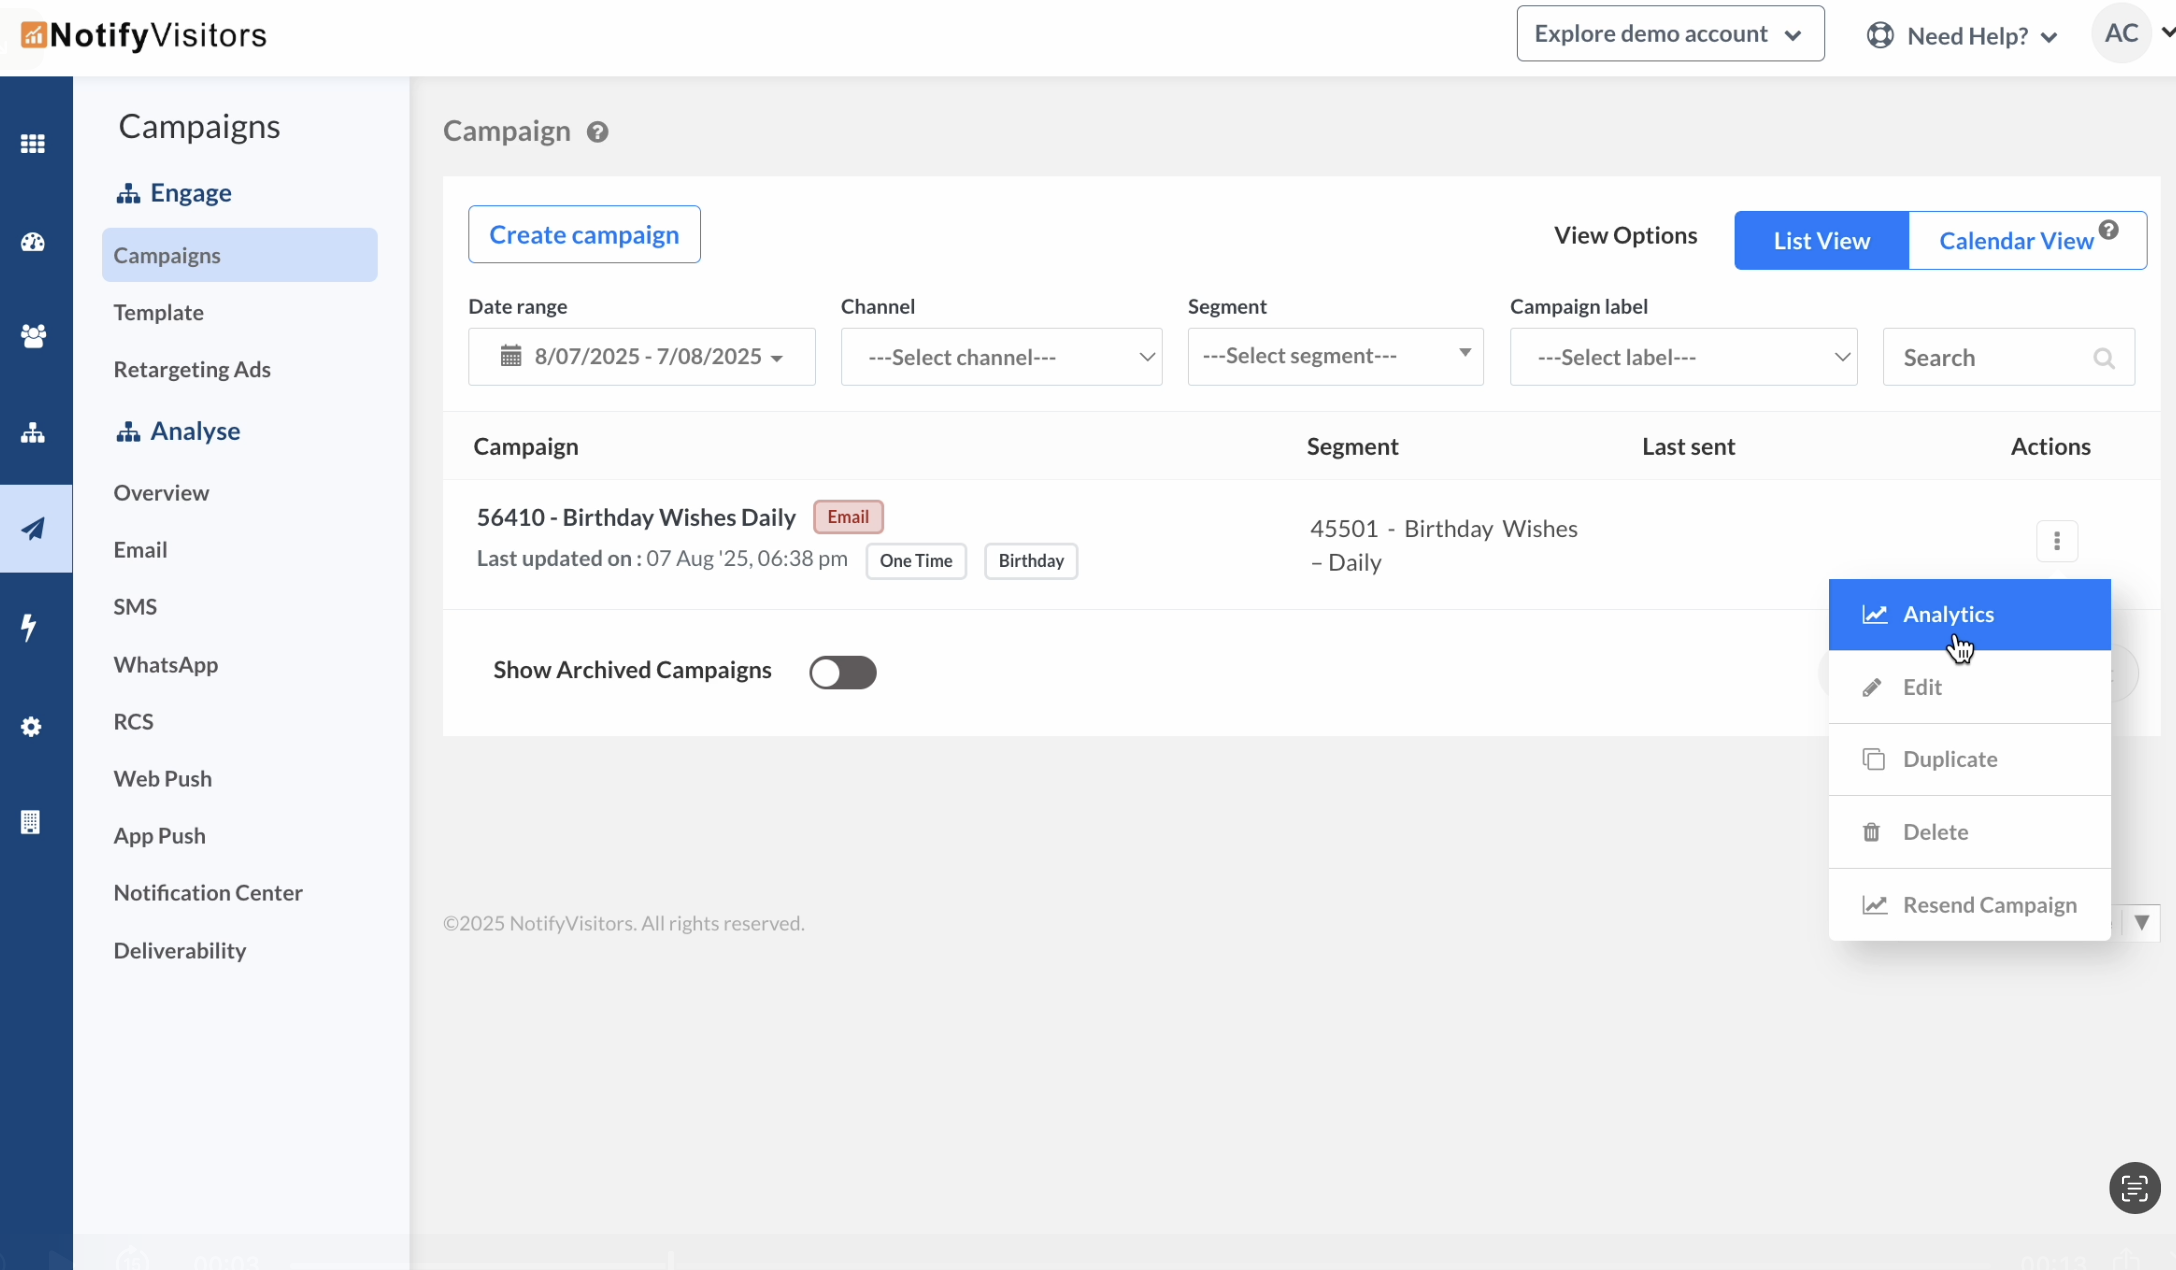
To check the analytics for your email campaign, head over to the Email Campaigns section. Click the three-dot action button next to your birthday email campaign and select Analytics.
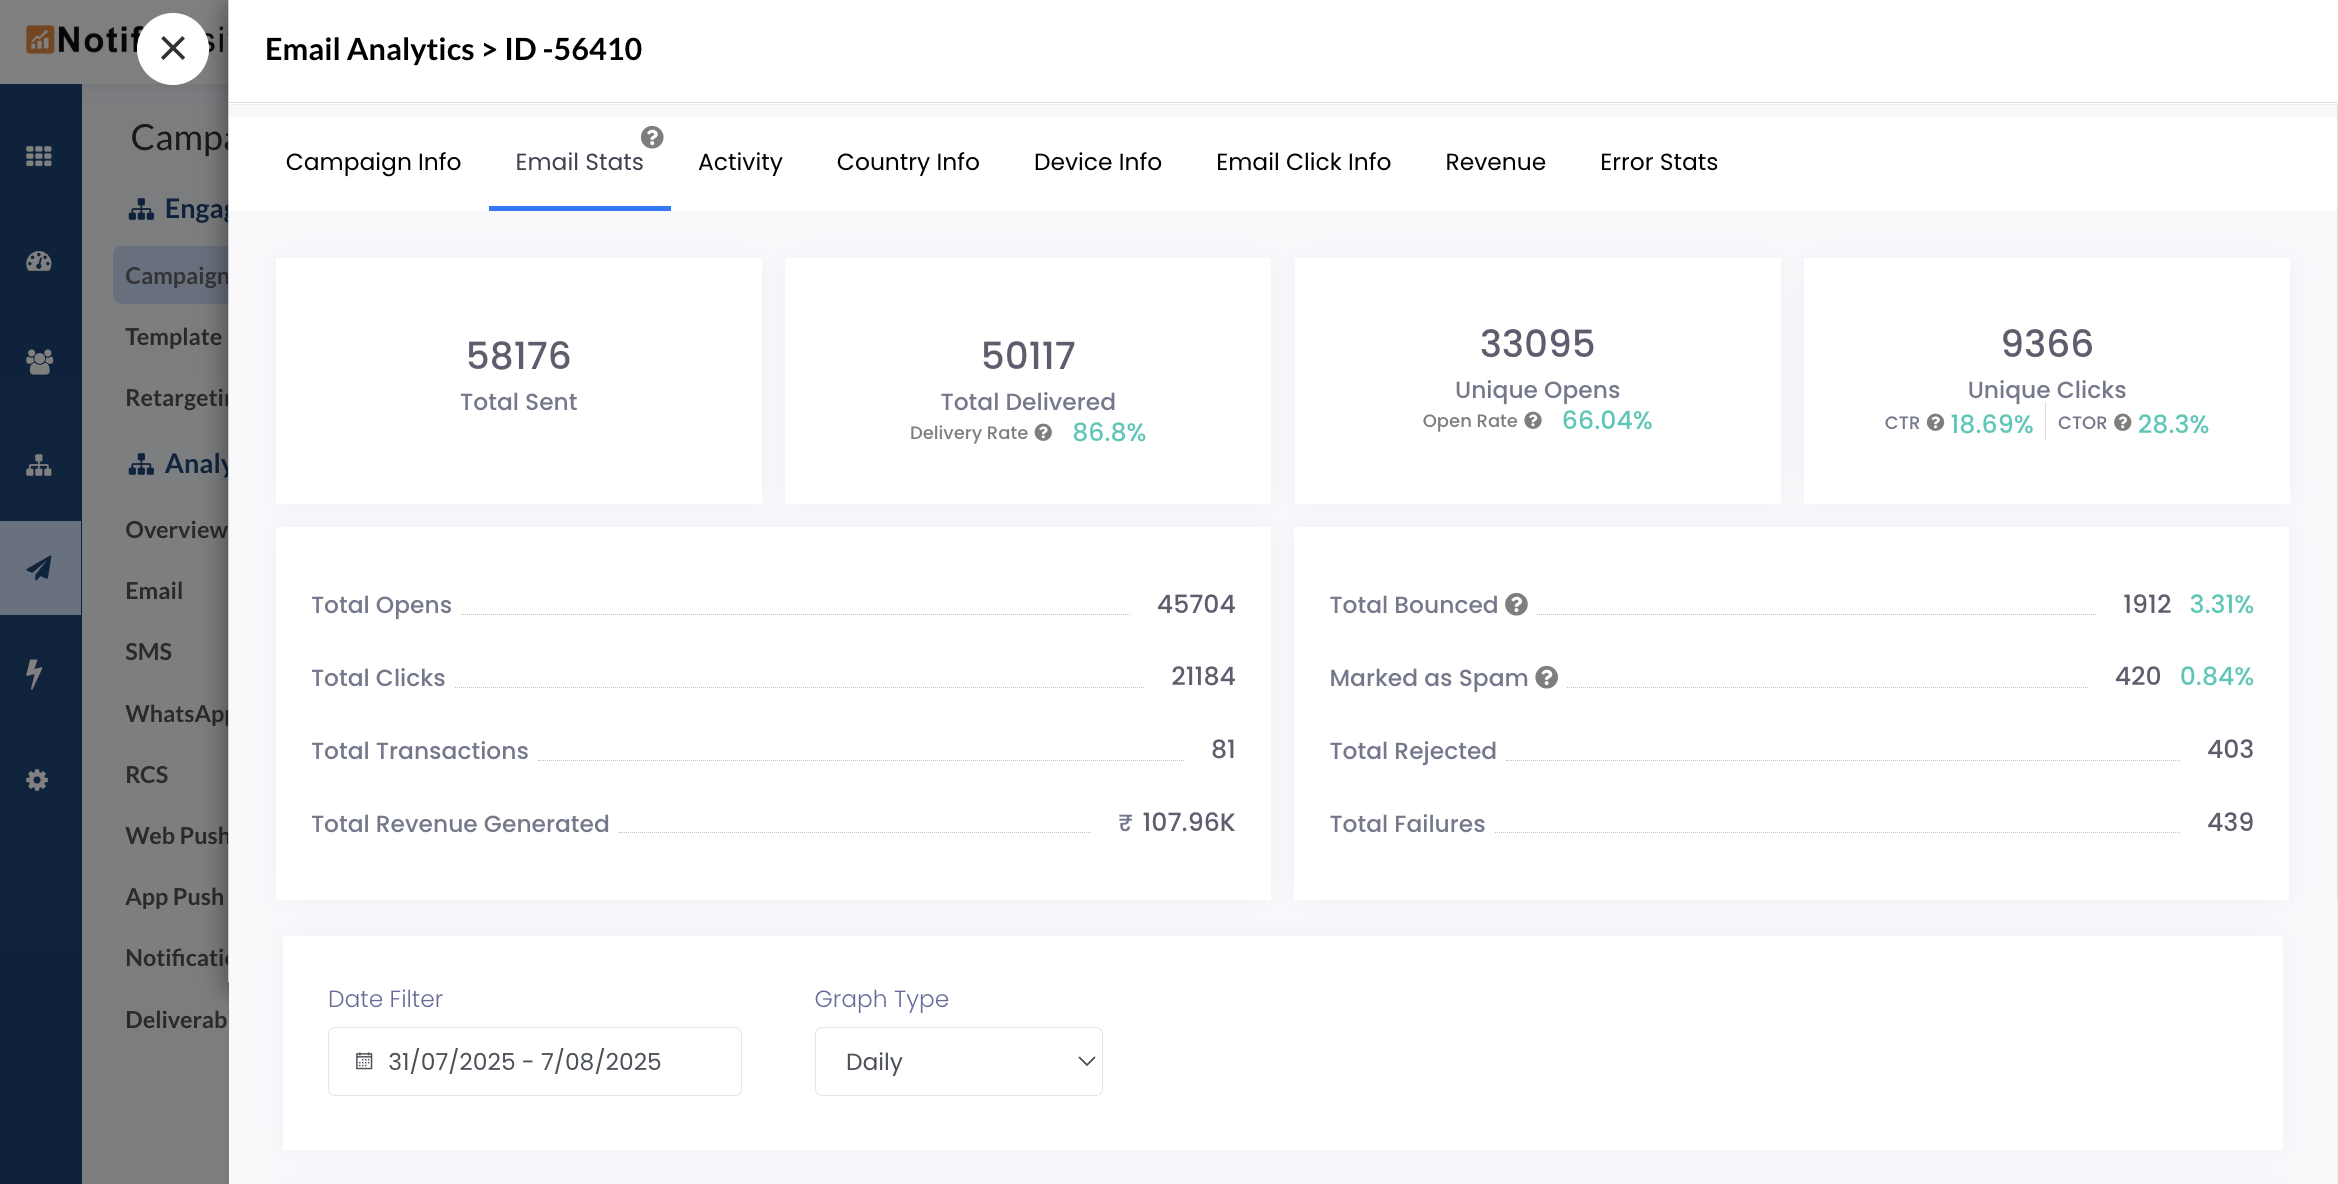
Once you’re there, click on the Email Stats tab to view key performance metrics like Sent, Open Rate, Click-Through Rate, Conversion Rate, Spam, and more. To dive deeper, click here.
You can follow the same steps to view analytics for other channels, or use the links below for detailed tutorials:
Unified reporting: All channels at a glance
To get a consolidated view of all birthday and anniversary campaigns across multiple channels Go to the Campaigns > Overview section. Use the Label Filter and select the relevant tag e.g., birthdate, anniversary(i.e. the label you’ve applied to your birthday/anniversary campaigns). This filters analytics to only show campaigns with that label, giving you a unified report across Email, SMS, Push, WhatsApp.
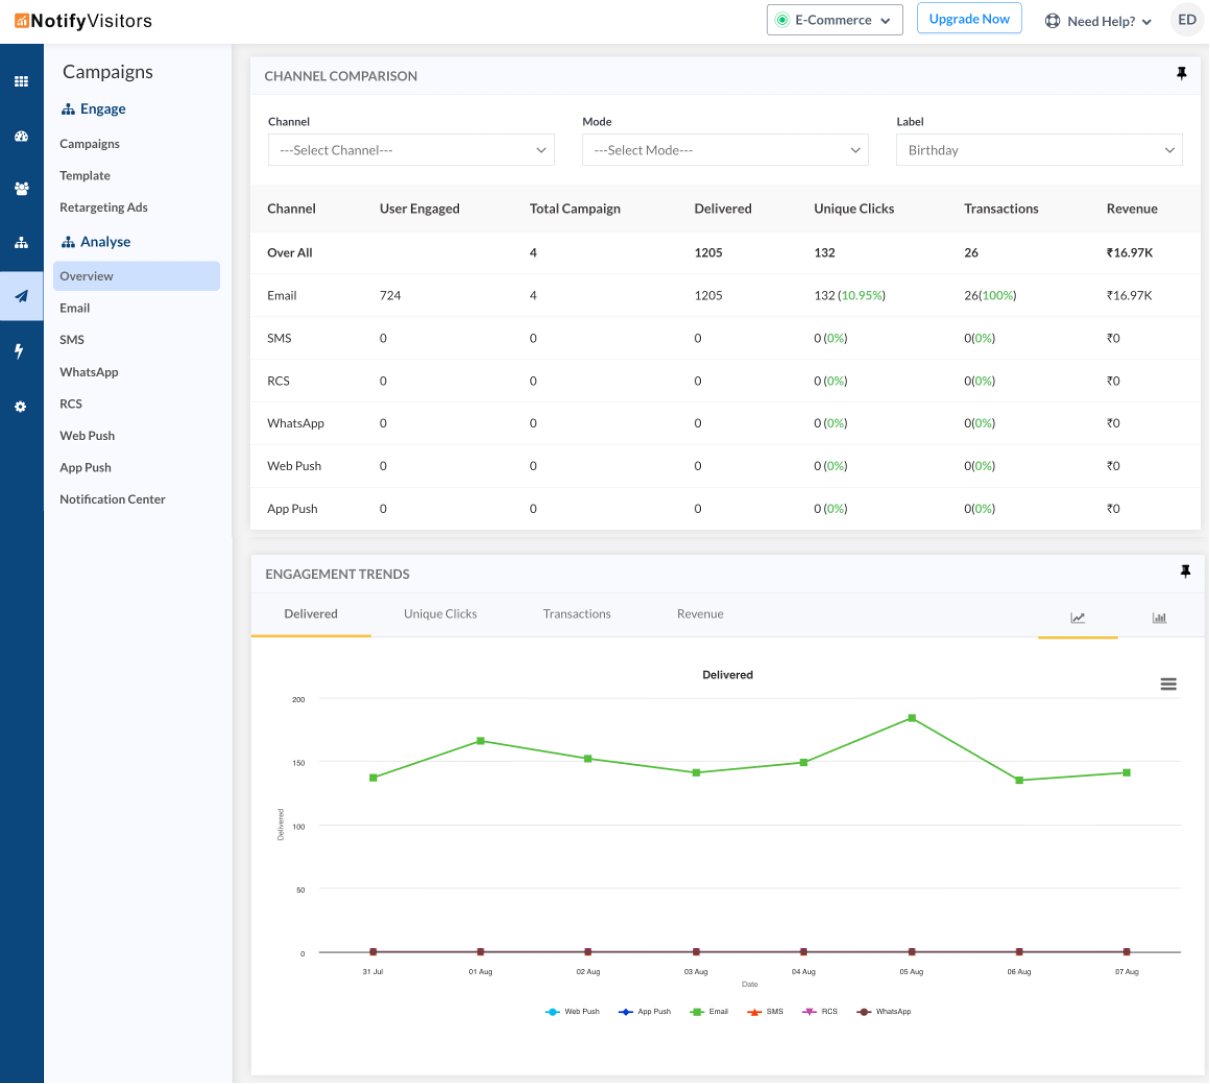
As shown in the image above, the table provides a side-by-side comparison of key metrics such as user engagement, number of campaigns, delivery rate, unique clicks, transactions, and revenue across different channels, all filtered specifically for birthday campaigns. Right below the table, there’s a trend graph that visually represents engagement data like delivery volume, unique clicks, transactions, and revenue over time, again focused on birthday campaigns.
You can apply the same approach for tracking and analyzing anniversary campaigns as well.
This centralized view makes it easy to compare channel performance, spot which ones are performing best, and fine-tune your future campaigns for better results.
Summary
By following this recipe, you’re not just sending well-timed messages, you’re building lasting emotional connections and creating opportunities for engagement, retention, and revenue.